Halloween is just around the corner, and you know what that means—spooky treats and hauntingly good fun! If you’re looking to add a touch of magic to your party spread, Witch Finger Cookies are the perfect way to do it.
Picture this: delightfully eerie cookies that look like witch fingers but taste like a sweet dream.
They’re not only incredibly simple to whip up, but they’re also guaranteed to be a hit with both kids and adults alike. Imagine the giggles and gasps they’ll elicit as guests take a bite. Ready to cast a spell in your kitchen?
Let’s enter into the bewitching world of easy Halloween baking!
What are Witch Finger Cookies?
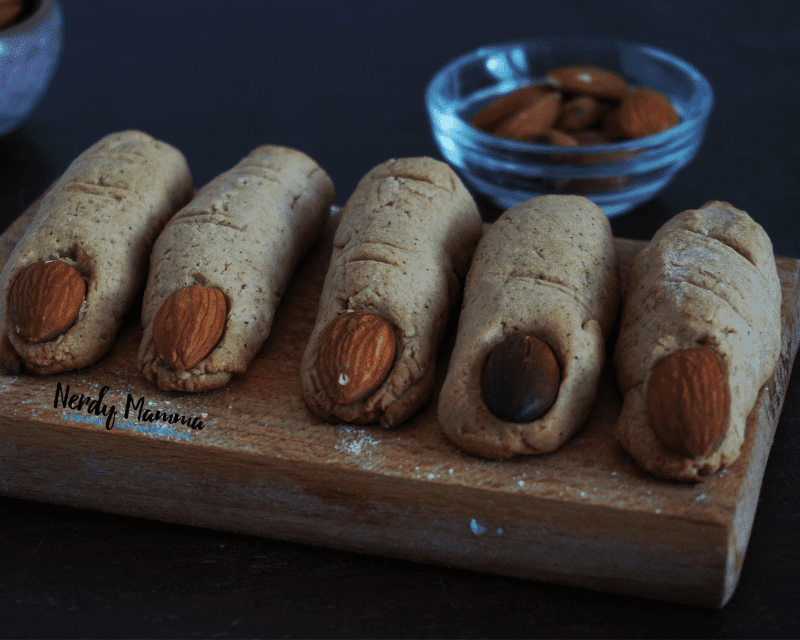
Witch Finger Cookies are the ultimate Halloween treat, designed to give your guests a delightful scare! These cookies are crafted to mimic eerie, bony witch fingers, complete with almonds or other nuts serving as spooky fingernails.
Made from a simple sugar cookie dough, these treats can be dyed with food coloring for an added ghoulish effect. Flavored with hints of ginger and cinnamon, they offer a surprisingly sweet and delightful contrast to their creepy appearance.
Perfect for Halloween parties, these cookies are sure to be a crowd-pleaser, delighting kids and adults alike as they bite into these deliciously sinister snacks!
Now, let’s talk about what to pair with these spine-tingling cookies. First up, a vegan hot chocolate is a fantastic match. The warm, velvety texture contrasts beautifully with the crispness of the cookies, and the deep chocolate flavor adds a touch of indulgence to the spooky fun.
Next, consider serving a tangy apple cider. The cider’s refreshing sweetness and hint of spice perfectly complement the subtle almond and vanilla flavors of the cookies.
Lastly, a fun and fizzy orange soda is an excellent choice, adding a pop of color to your table and a burst of citrusy zest to balance the sweetness of the Witch Finger Cookies.
These pairings will not only enhance the flavors but also add a touch of Halloween magic to your gathering!
Witch Finger Cookies Ingredients
175g (⅞ cup) sugar – A touch of sweetness to balance the spice, sugar also helps the cookies gain a golden-brown finish.
85g (¼ cup) golden syrup – A thick, amber-colored form of inverted sugar syrup, golden syrup is responsible for the moist texture of your cookies.
100g (⅓ cup + 2 tbsp.) salted butter – Gives your cookies a rich, creamy taste and makes them extra tender. Salted butter also enhances the other flavors in the recipe.
350g (2 ½ cups) plain flour – Plain flour, also known as all-purpose flour, is used as the primary structure in these cookies, providing them with their characteristic texture.
1 tbsp. ground ginger – The star ingredient, ground ginger gives your cookies a warm, spicy taste that’s perfect for the cold weather.
1 tsp. ground cinnamon – Complements the ginger with a sweet and woody flavor, and also has a lovely aromatic quality that fills your kitchen as the cookies bake.
1 egg, beaten – Eggs act as a binding agent, ensuring all your ingredients blend smoothly together, and they contribute to the overall flavor, color, and texture of your cookies.
10 blanched almonds – Add a delightful crunch and a slightly nutty flavor to your cookies. Not to mention, they’re a great source of healthy fats and protein!
How to Make Witch Finger Cookies
Now that you have all your ingredients, it’s time to create your deliciously spooky recipe!
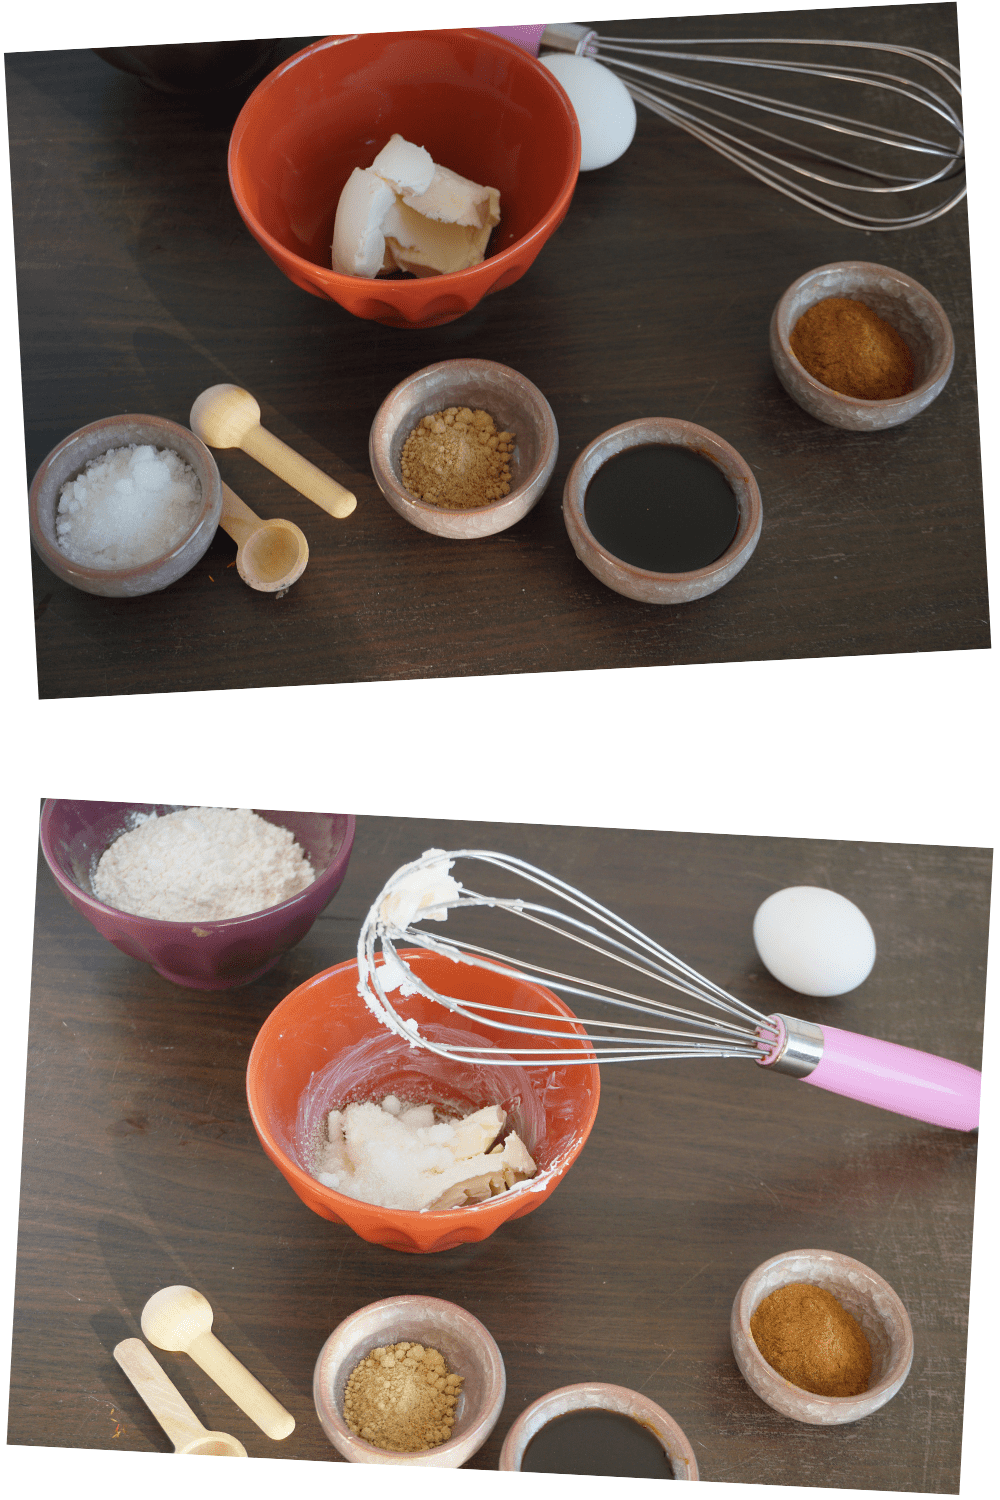
- Start by combining the sugar and butter in a cup or small bowl and give it a thorough mix until well blended.
- In a different container, stir together the cinnamon, ginger, and flour. This is your spice mix. Now, add this blend to your already mixed egg and butter.
- Next, gradually pour in the brown sugar while stirring constantly until all your ingredients are beautifully combined.

4. Once done, you will have your dough. Neatly wrap this dough in cling film and pop it into the fridge to chill for at least 30 minutes.
5. While your dough is chilling, preheat your oven to 200°C/180°C (350°F to 375°F) and line two baking trays with baking parchment to prevent your dough from sticking during baking.
6. After the chilling time is up, remove your dough from the fridge and get ready to shape it.
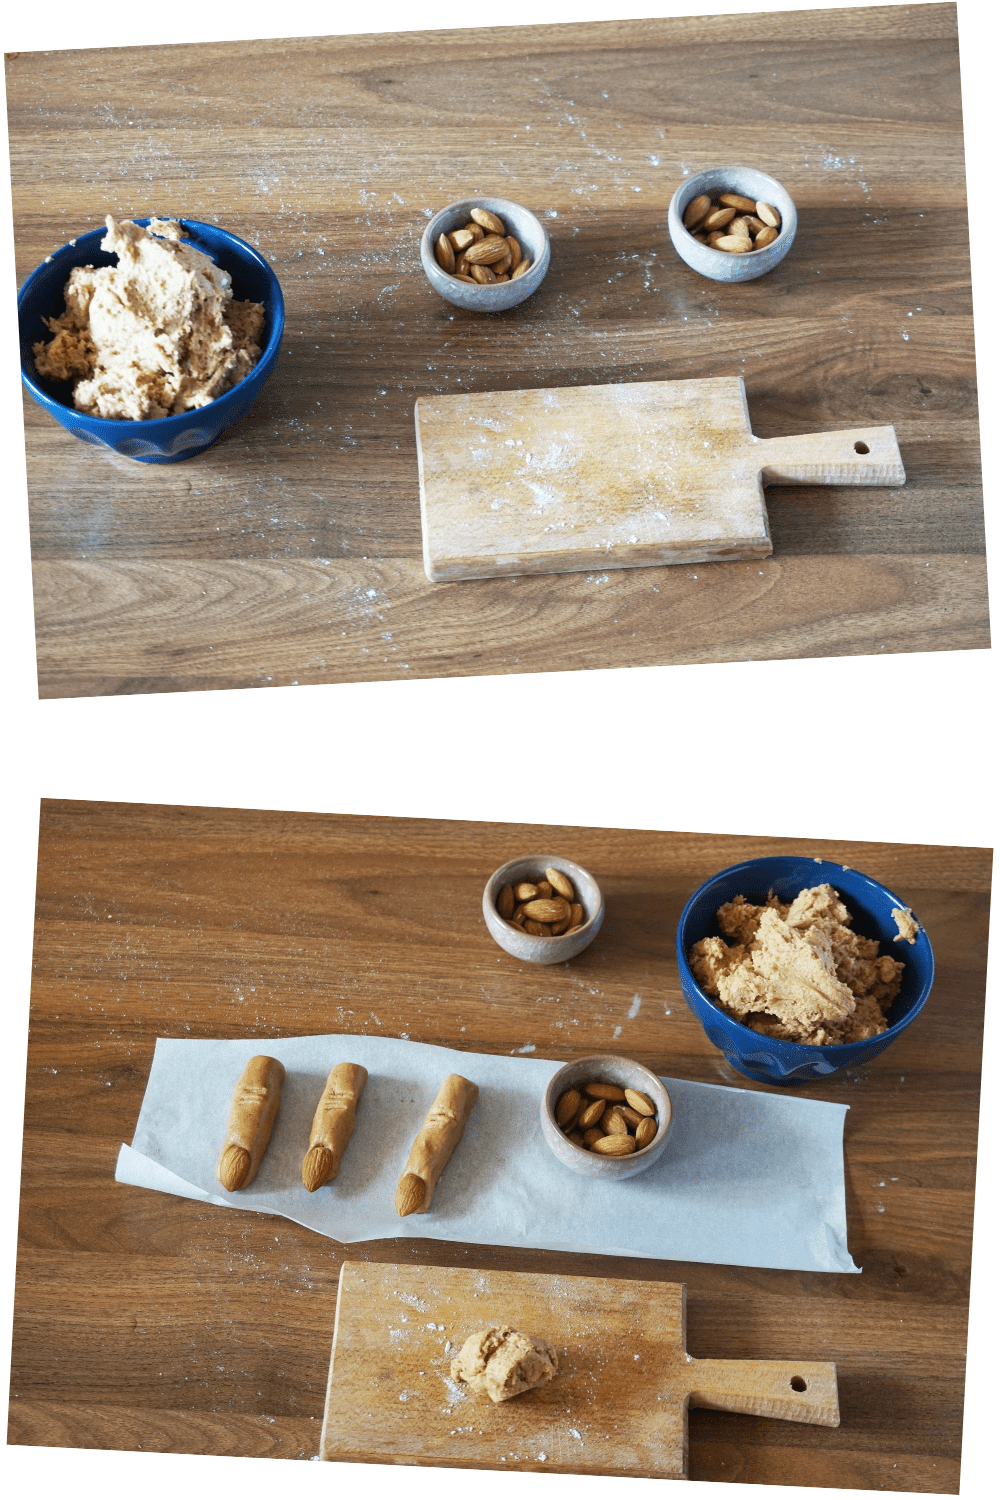
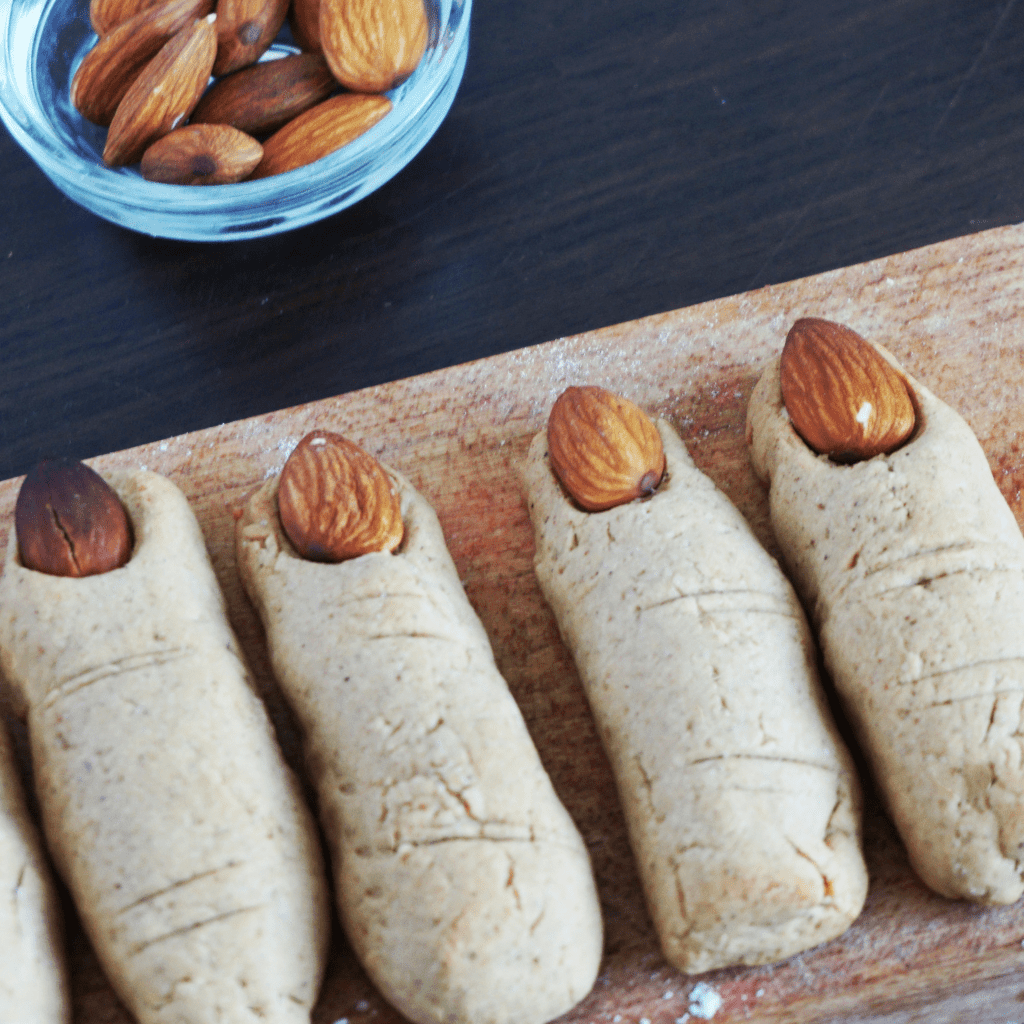
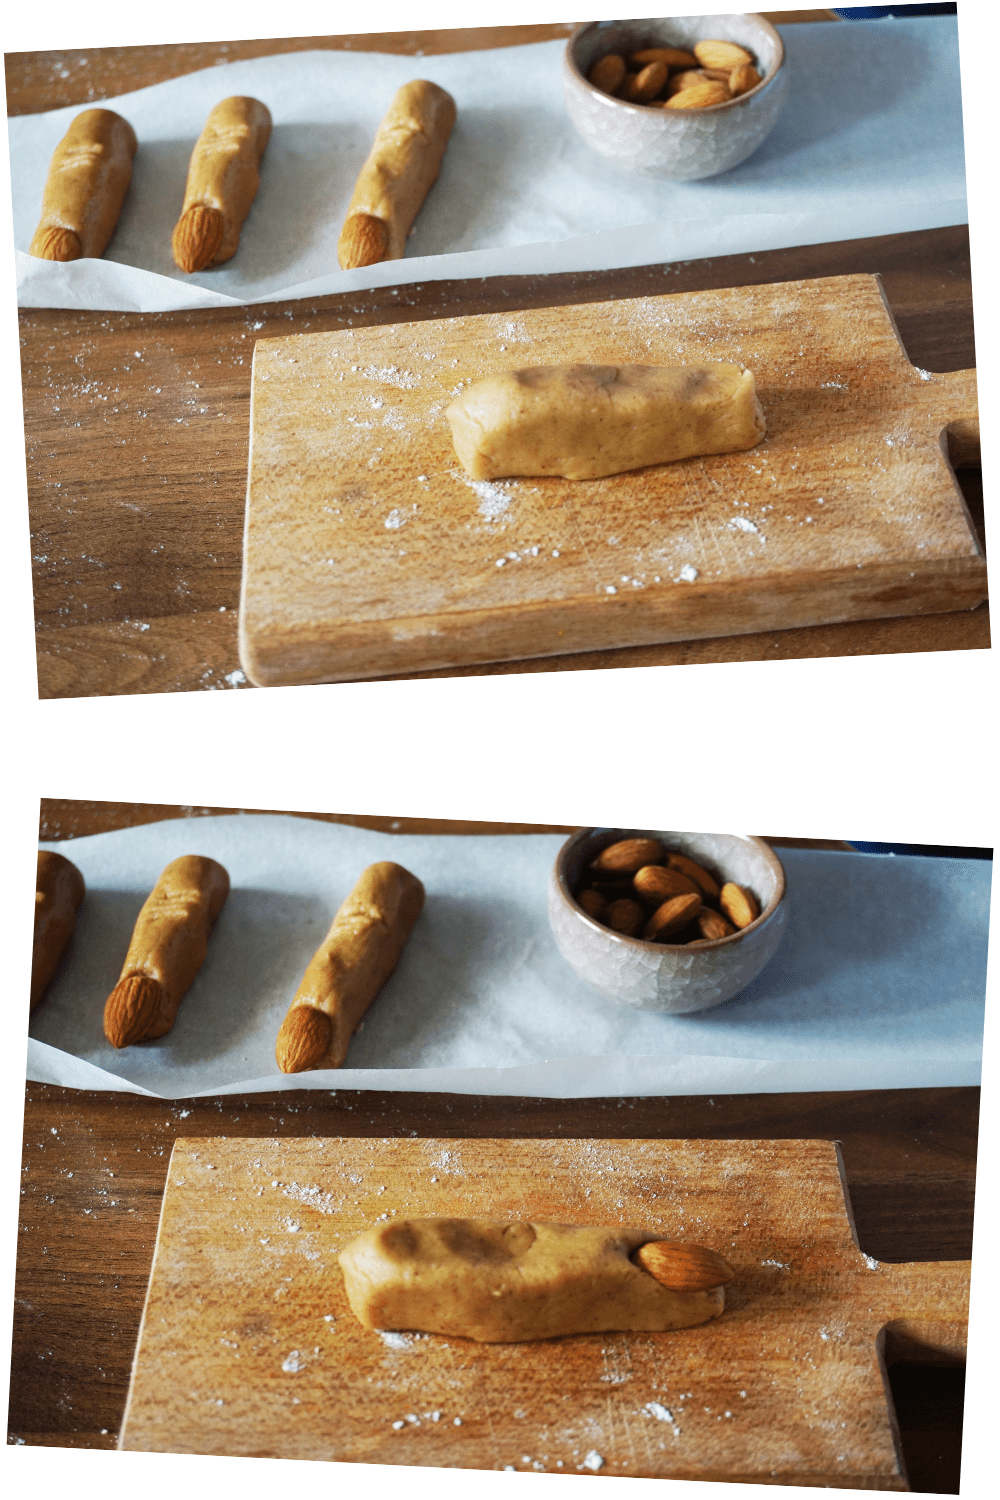
7. Divide the dough into 45 equal balls and mold each piece into a finger-like shape.
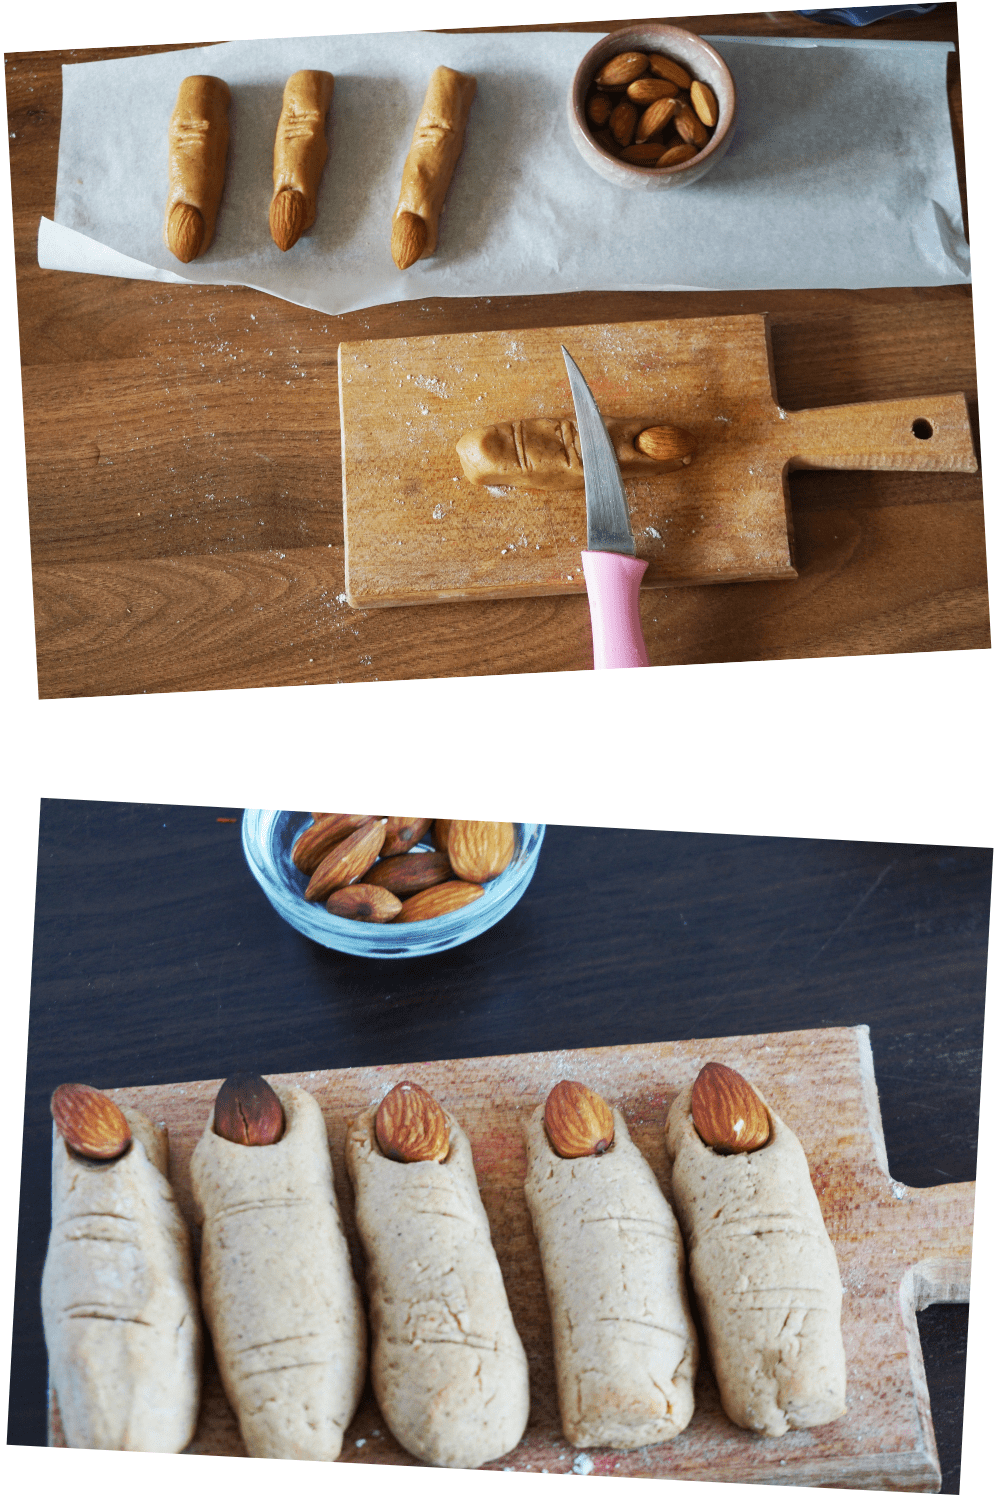
8. Create knuckles by gently pressing the back of a knife into the dough.
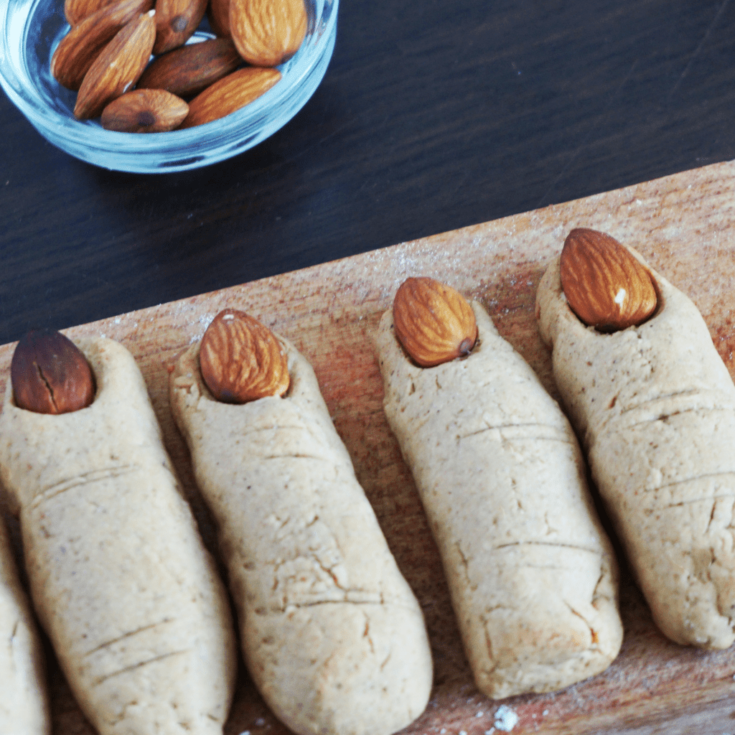
9. Then, lightly press an almond into one end of each piece to give the look of a fingernail.
10. Arrange your ‘fingers’ neatly on the baking trays and let them chill for another 30 minutes.
11. Finally, bake them in your preheated oven for 10 minutes or until they turn a pale golden color.
12. And voila! You’ve just created an unforgettable treat!
Tips for Making This Recipe
- Proper Mixing: ensure all ingredients are mixed thoroughly to achieve a consistent taste. The sugar, butter, and spice mix should be fully incorporated.
- Chilling the Dough: don’t skip the chilling process. This little pause allows the butter to harden again, which ultimately helps the cookies keep their shape in the oven.
- Flour Quality: the quality of your flour matters. High-quality plain flour will give your recipe the best texture and taste.
- Shaping the Cookies: using the back of a knife to simulate the knuckles on a finger gives a unique touch. Be gentle, so you don’t overly deform the cookies.
- Baking Time: monitor your cookies closely while they’re in the oven. Baking times can vary greatly depending on your oven. You want them to be a pale golden color.
- Temperature Check: be sure your oven is at the correct temperature before putting your cookies in. This will ensure that they bake evenly and at the correct pace.
Frequently Asked Questions
Can I make these cookies ahead of time?
Absolutely! You can prepare the dough a day in advance and store it in the refrigerator. When you’re ready to bake, simply shape the fingers and pop them in the oven. The baked cookies can be stored in an airtight container for up to a week.
How do I get the cookies to look like fingers?
Roll the dough into finger-sized logs, then press gently in the middle to shape knuckles. Use a knife to create small lines for realistic knuckle creases. Place an almond slice at one end for the nail, and voilà—witch fingers!
Can I substitute almonds with something else?
Definitely! If almond slices aren’t your thing, you can use pumpkin seeds or even small pieces of chocolate for the nails. Be creative with what you have on hand!
What if I don’t have food coloring?
No worries! The cookies look just as spooky in their natural color. You can make them more eerie by dusting them with a bit of cocoa powder or cinnamon for a “dirty” look.
How can I involve kids in making these cookies?
Kids love shaping the dough into creepy fingers and adding the “nails.” It’s a great way for them to get creative in the kitchen. Just make sure to supervise them when using the oven or any sharp tools.

Conclusion
And there you go! A delightful treat that’s sure to bring a smile to your face and satisfy your sweet tooth. One thing is for sure, with this recipe, you’ll be able to make a statement at your next gathering or simply enjoy a personal treat at home. If you’ve tried out this recipe, we’d love to see how your delights turned out.
So don’t forget to snap a photo of your beautiful creation and share it with us. Also, leaving a rating for this recipe would be appreciated. Your feedback helps us better understand your preferences and guide you toward more recipes that you’ll absolutely love.
Witch Finger Cookies - Easy Halloween Cookies
Spook up your Halloween with Witch Finger Cookies! Creepy, buttery treats perfect for parties. Fun to make, delicious to eat!
Ingredients
- 175g (⅞ cup) sugar
- 85g (¼ cup) golden syrup
- 100g (⅓ cup + 2 Tbsp) salted butter
- 350g (2 ½ cups) plain flour
- 1 tbsp. ground ginger
- 1 tsp. ground cinnamon
- 1 egg, beaten
- 10 blanched almonds
Instructions
- Put the sugar and butter in a cup or small bowl and mix them well. In a different cup, mix cinnamon, ginger, flour and add this mix to the egg and butter mix. Add carefully the brown sugar and stir them until combined well.
- Wrap the dough in cling film and chill for at least 30 mins in the fridge.
- Heat oven to 200°C/180°C (350°F to 375°F) and line two baking trays with baking parchment.
- Remove the dough from the fridge and divide the dough into 45 balls and roll each piece into a finger shape. Press the back of a knife into the dough to make knuckles. Lightly press almond to the nail part. Put on lined baking trays and chill for 30 mins. Bake for 10 mins until pale golden.
Nutrition Information:
Yield:
18Serving Size:
1Amount Per Serving: Calories: 53Total Fat: 1gSaturated Fat: 1gTrans Fat: 0gUnsaturated Fat: 1gCholesterol: 12mgSodium: 16mgCarbohydrates: 9gFiber: 0gSugar: 2gProtein: 1g
Enjoy!
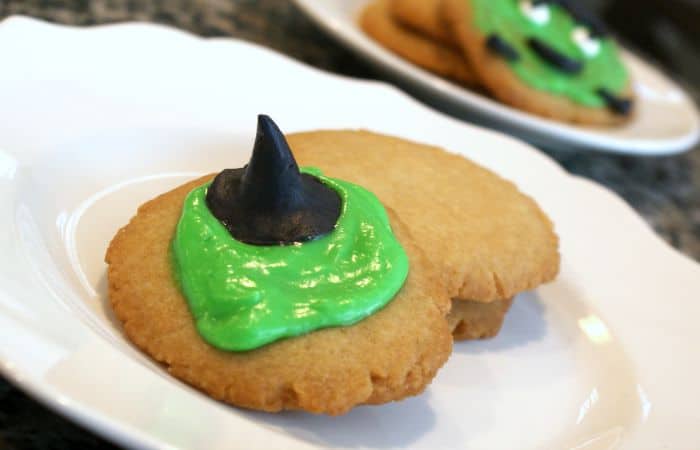
Check these other Halloween cookies.
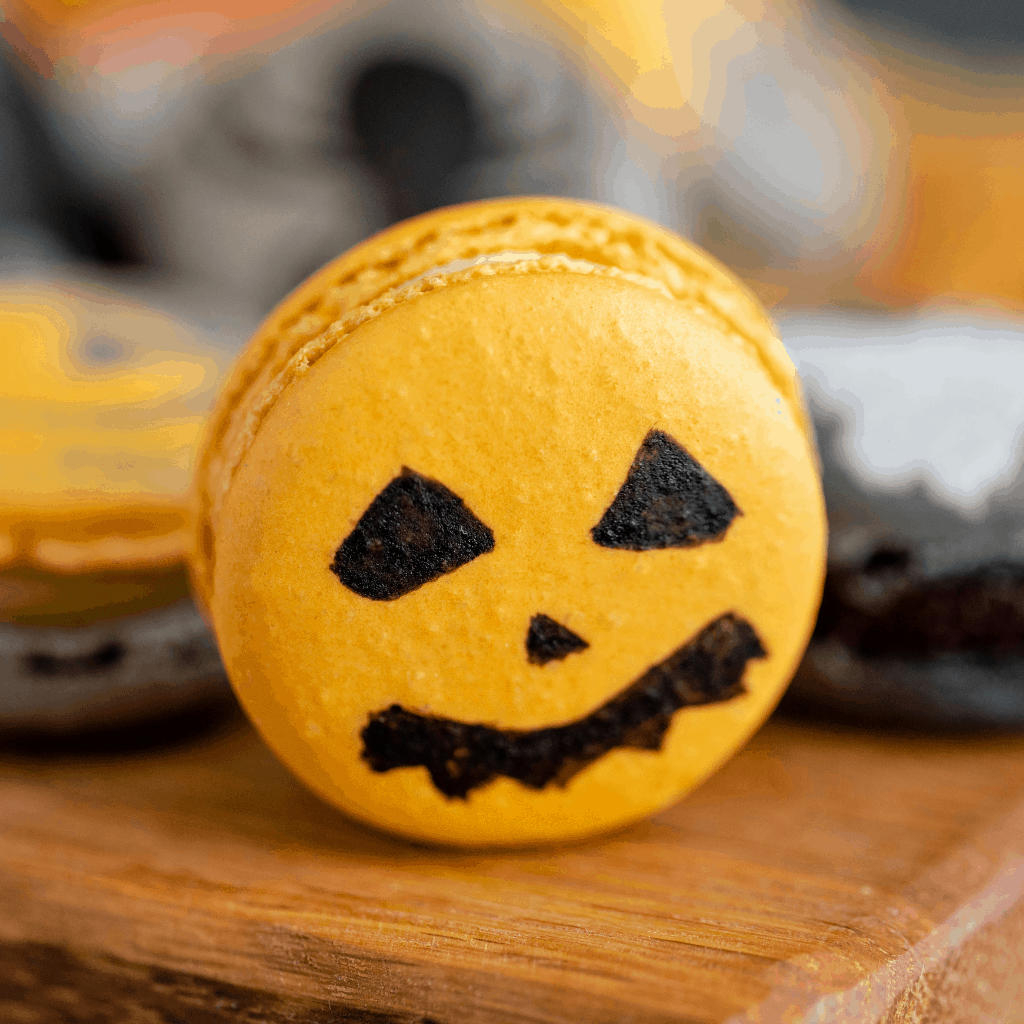
Jack-O-Lantern Macarons Recipe
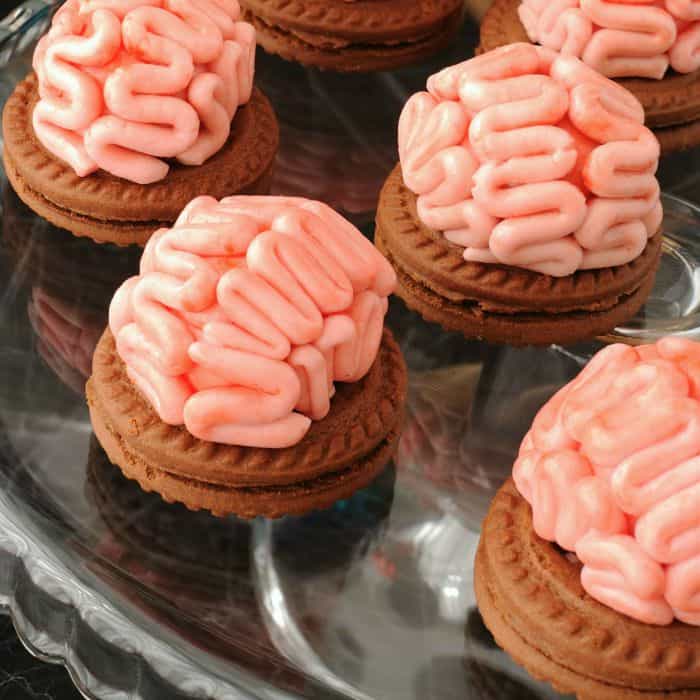
Zombie Brain Cookies
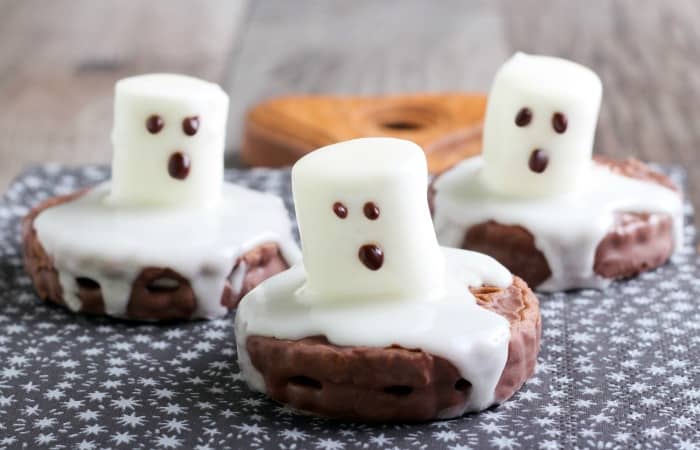
Easy Melted Ghost Cookies
Melted Witch Cookies