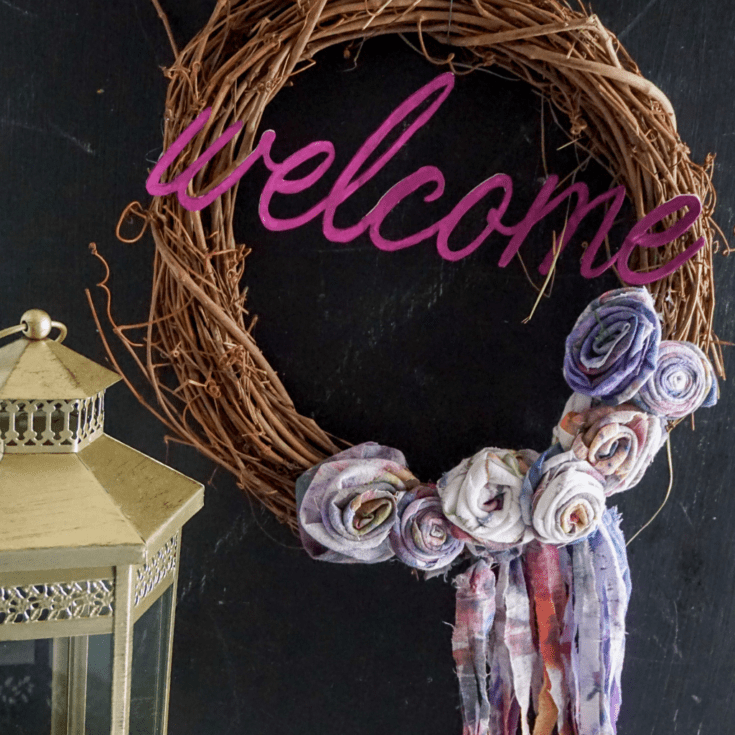
Another exciting Cricut craft is the Welcome Grapevine Wreath. It is so pretty to look at especially when it is hanged on the door.
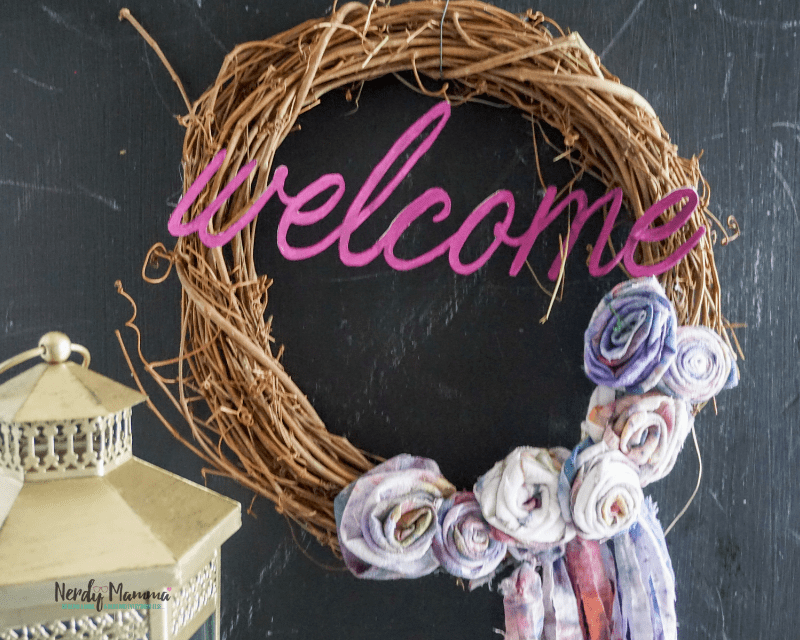
Grapevines and grapevine wreath may have interesting symbols. It can be about the approaching fall and may associate with harvesting. But sometimes it is also associated with summer, too. Maybe because a variety called Vitis Aestivalis,(Norton/Cynthiana grape) is also called Summer Grape, the official State Grape of Missouri. What do you think?
It also symbolizes Christianity, too. At the same time, grapevines are being related to the Greek God Dionysus. Hmm.
However you associate the grapevine wreath is, I’m sure it is for the positivity.
Back with the Welcome Grapevine Wreath. I really like this Cricut craft. It is so pretty! As soon as I hung it on my front door, I was like smiling from ear to ear. I really did a great job… so I thought. LOL!
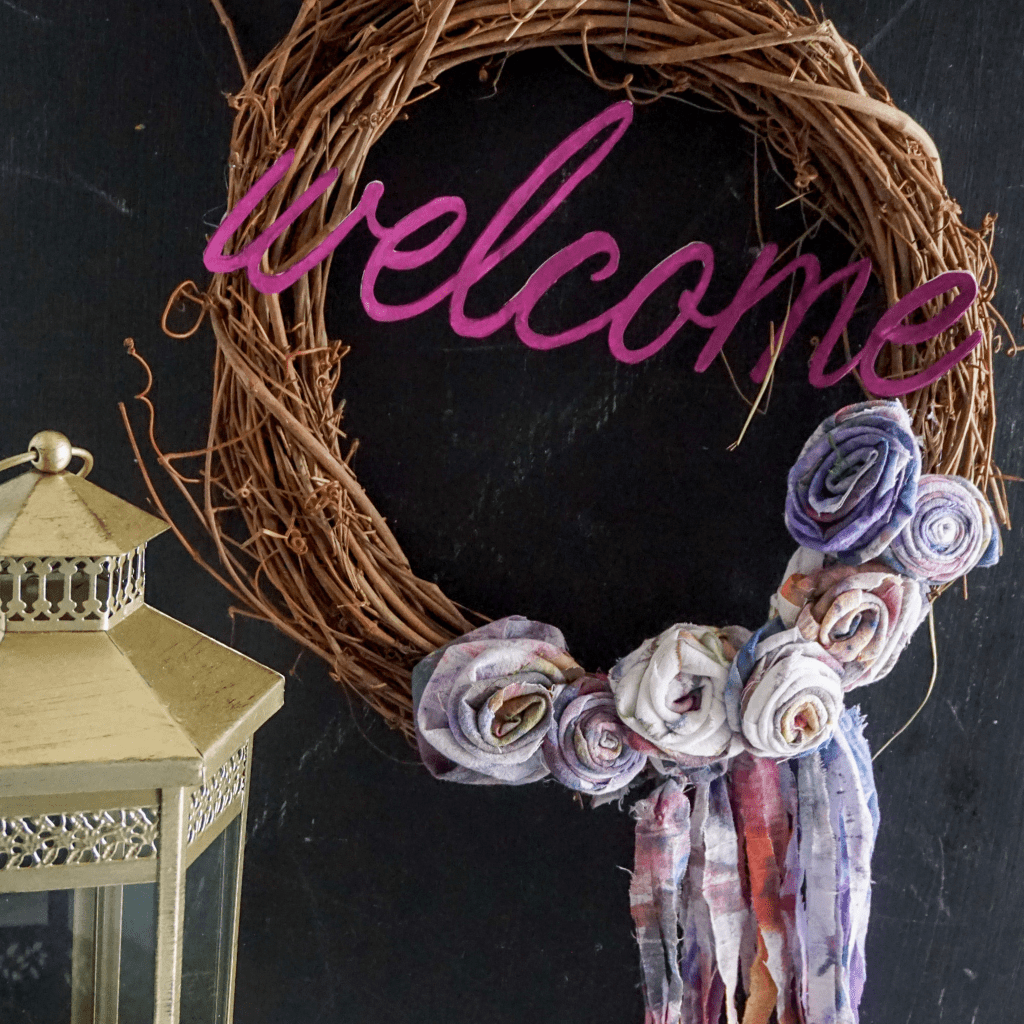
Oh, just a tip, before hanging it, give it a good shake. This is to make sure it is sturdy enough and things you attached won’t fall. Well… You hang it on your door and leave it outside. Winds can be strong. The constant opening and closing of the door can also cause some damage to the decorations.
Making the Welcome Grapevine Wreath
Wreaths are a common household door display. Most of these can be bought and can be more available depending on the season. But more and more people are creating their own wreaths, because they can put their own personal touch on their creations.
This colorful Welcome Grapevine Wreath is one awesome Cricut craft project that can be made easily.
To make this craft, have the supplies ready first. They are listed below. For crafters out there, you know where to find them. for beginners, you can easily find them in craft stores or online. I have put the link where I bought mine to make it easier for you.
You can’t make this craft without the tools. Have them on hand as well.
Supplies
- 12-Inch Grapevine Wreath
- 1 Large Kitchen Towel
- 1 Chipboard Sheet
- Purple and Pink Tie-Dye
- Black Acrylic Paint
- Mod Podge Craft Sealant
Tools
- Cricut Maker
- Knife Blade Tool
- Strong Grip Mat
- Tape
- Hot Glue Gun & Glue
- Scissors
Instructions for Making the Welcome Grapevine Wreath
Start by tie-dyeing your kitchen towel. Twist it up and then wrap the rubber bands around the center of your bundle in 4-5 places then place it in the bowl.
Either spray or pour (my preferred method, honestly) the dye onto your towel, saturating the towel in multiple places with purple or pink dye, respectively. Allow the tie-dyed towel to dry completely before messing with it again.
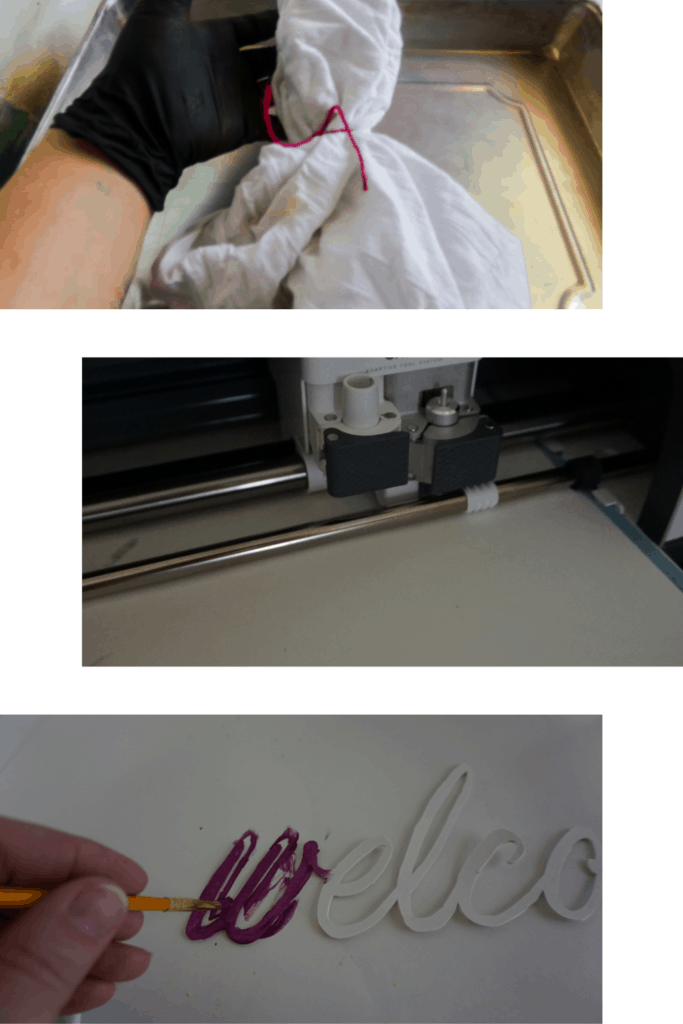
While the towel is drying, go ahead and make your welcome element by downloading the SVG file. Immediately load the SVG file into Design Space, then insert the image for a new project.
Click “Make It” in Design Space, and set the material type on the machine to “Chipboard”. Load the knife blade into your Cricut Maker, then follow prompts to load and cut. Be sure to use a strong grip mat for the chipboard and tape it down in each corner. Unload when finished cutting. Cut a second welcome shape before closing out of Design Space.
Layer the two pieces of chipboard on top of each other and hot glue them in place.
Once your tie-dyed towel is dry, iron it, if desired to set in the colors. Then cut the towel into 2-inch (approximately) wide strips.
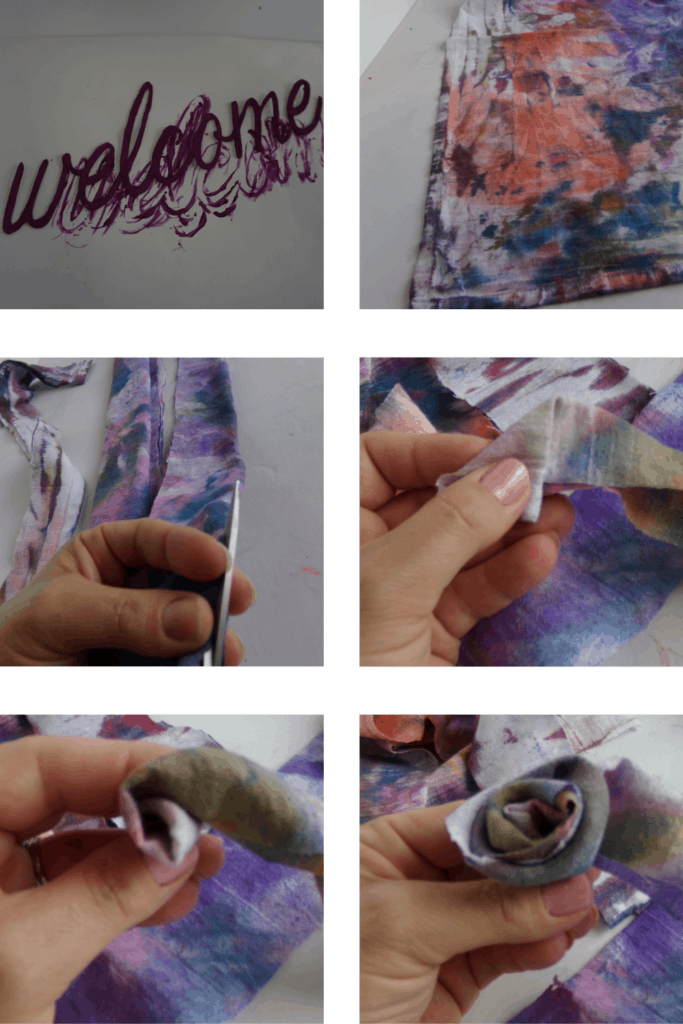
Take a single strip and fold it in half, then lay it flat on the table. Working from one end, roll the strip to make the rose. Make sure to make one end of the roll a little tighter than the other to make the rose full or make it looser in the center to make a bud. Repeat to make 5-10 roses of varying sizes.
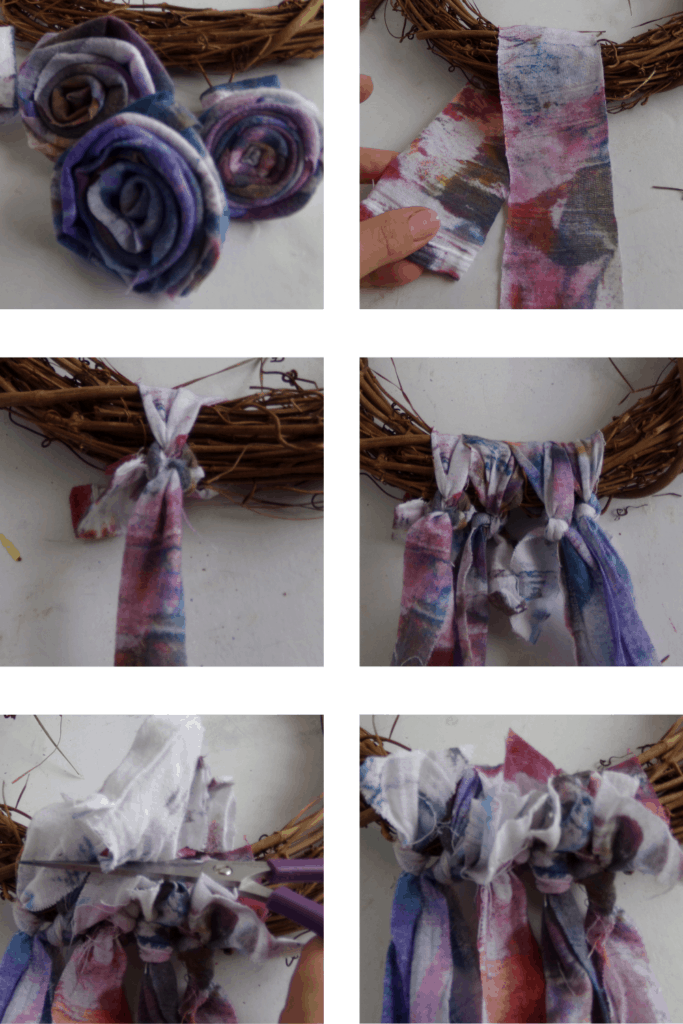
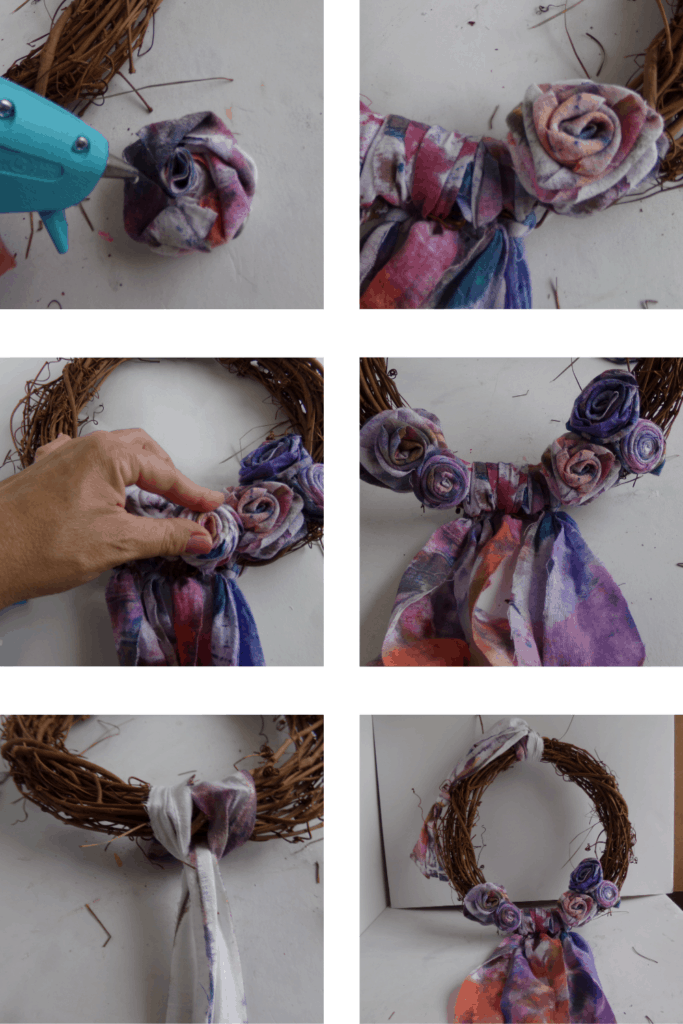
Hot glue each of the roses on the bottom of the wreath to one side.
With the remaining strips of towel, tie them onto the bottom of the wreath, then cut them into ½-inch wide strips, if desired.
Hot glue the welcome element to the front of the wreath, on each side of the wreath.
Use one of the remaining strips of the towel to make a hanger loop on the top of the wreath and enjoy!
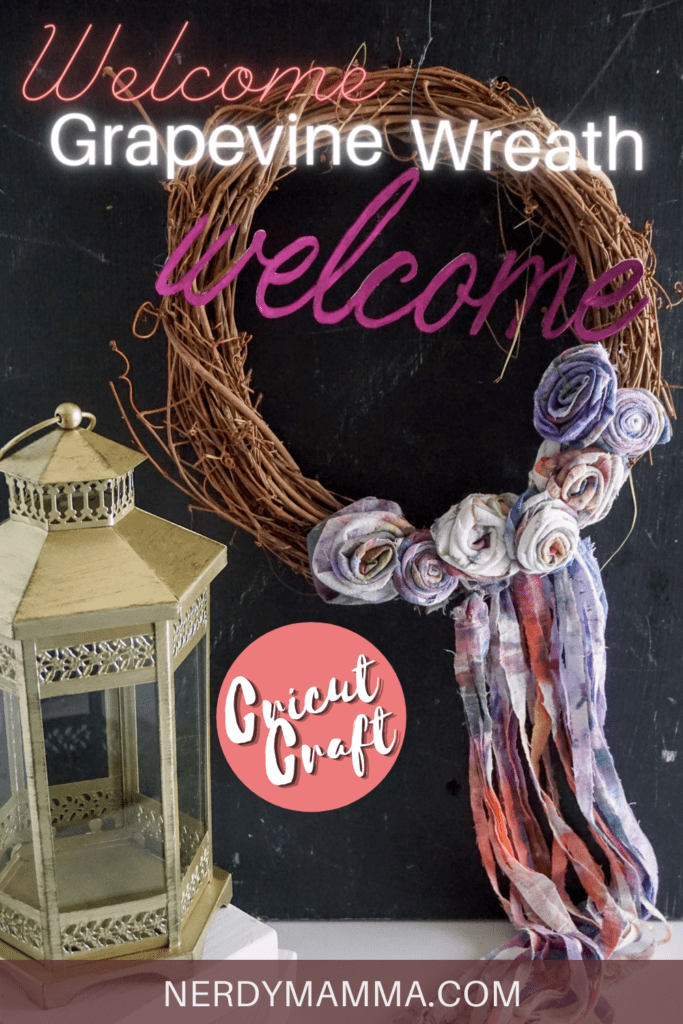
Lovely! Isn’t it?
Not making it yet? Still completing your materials? Pin this DIY into your Cricut Craft Pinterest board for later.
Welcome Grapevine Wreath Cricut Craft
This easy DIY Welcome Grapevine Wreath. is absolutely stunning. Another interesting Cricut craft that you will be proud of making it.
Materials
- 12-Inch Grapevine Wreath
- 1 Large Kitchen Towel
- 1 Chipboard Sheet
- Purple and Pink Tie-Dye
- Black Acrylic Paint
- Mod Podge Craft Sealant
Tools
- Cricut Maker
- Knife Blade Tool
- Strong Grip Mat
- Tape
- Hot Glue Gun & Glue
- Scissors
Instructions
- Start by tie-dyeing your kitchen towel. Twist it up and wrap the rubber bands around the center of your bundle in 4-5 places then place it in the bowl.
- Either spray or pour (my preferred method, honestly) the dye onto your towel, saturating the towel in multiple places with purple or pink dye, respectively. Allow the tie-dyed towel to dry completely before messing with it again.
- While the towel is drying, go ahead and make your welcome element by downloading the SVG file. Immediately load the SVG file into Design Space, then insert the image for a new project.
- Click “Make It” in Design Space, and set the material type on the machine to “Chipboard”. Load the knife blade into your Cricut Maker, then follow prompts to load and cut. Be sure to use a strong grip mat for the chipboard and tape it down in each corner. Unload when finished cutting. Cut a second welcome shape before closing out of Design Space.
- Layer the two pieces of chipboard on top of each other and hot glue them in place.
- Once your tie-dyed towel is dry, iron it, if desired to set in the colors. Then cut the towel into 2-inch (approximately) wide strips.
- Take a single strip and fold it in half, then lay it flat on the table. Working from one end, roll the strip to make the rose. Make sure to make one end of the roll a little tighter than the other to make the rose full or make it looser in the center to make a bud. Repeat to make 5-10 roses of varying sizes.
- Hot glue each of the roses on the bottom of the wreath to one side.
- With the remaining strips of towel, tie them onto the bottom of the wreath, then cut them into ½-inch wide strips, if desired.
- Hot glue the welcome element to the front of the wreath, on each side of the wreath.
- Use one of the remaining strips of the towel to make a hanger loop on the top of the wreath and enjoy!
Check these other interesting crafts, too.
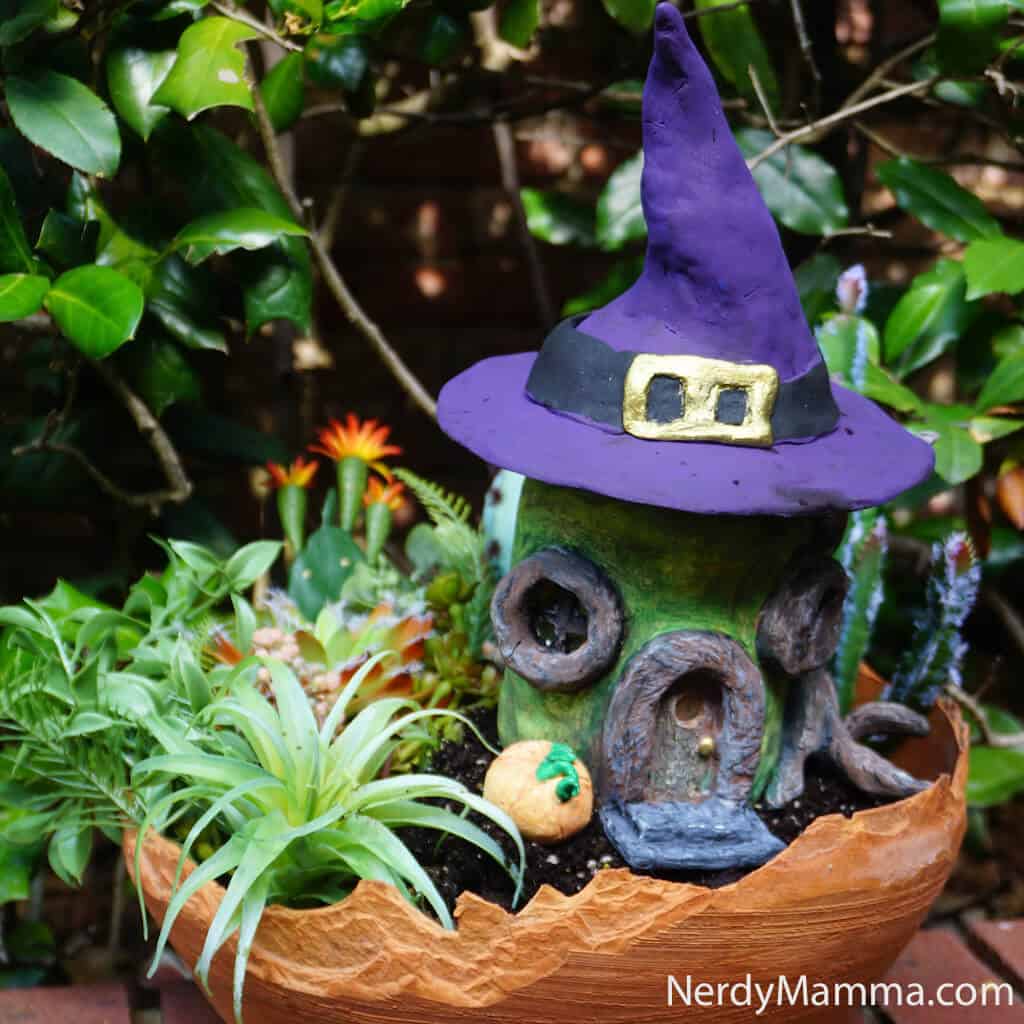
How to Make an Easy Witch’s Fairy House
Valentines Mini Gum Ball Machines

DIY Fall Entryway Cranberry Centerpiece
DIY Concrete Candle Holders
