As a mom, I make sure to spend ‘valuable’ time with my kids. Something worthwhile that would show or at least discover each others’ skills, yet enjoyable. Like making crafts. And so, this Baby Yoda Rock Painting Craft brings all the fun in creativeness.
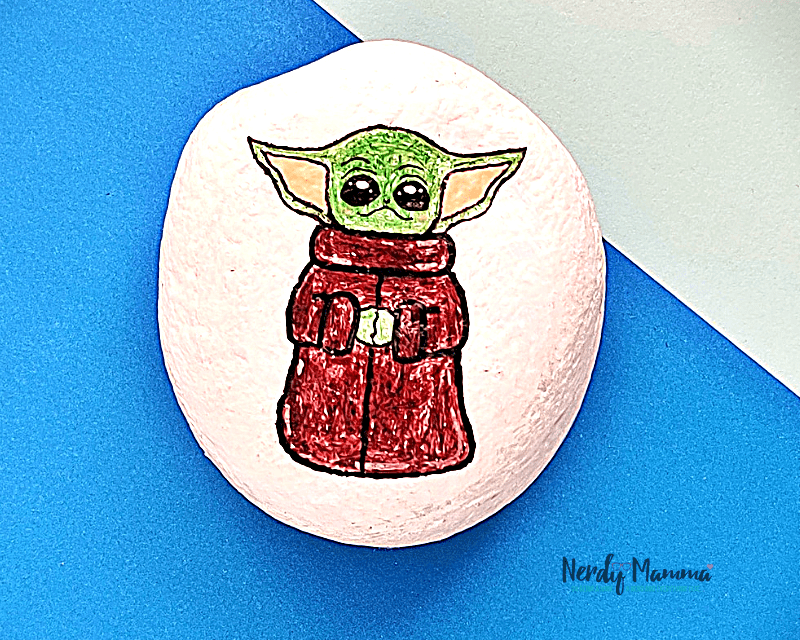
This activity will surely be enjoyed by the kids. Right from the start. Well, my kids do. They are familiar with StarWars actually because I’m a fan. And… we visited the Star Wars Galaxy’s Edge!
Oh! What I did to make it more fun? I also made these Light Saber Cookie Treats. Just perfect! While being busy with their Baby Yoda Rock Painting, they can have their Star Wars snacks!
Getting the Kids Busy with Baby Yoda Rock Painting
And so, when I made the supplies and their snacks ready, the activity starts. The fun starts by finding the nicest rock in our yard. Actually, I made them ready when I put a few rocks around some plants the other day when I thought about this craft.
Oh, they were so excited while checking the rocks they found and they’ll run to me and showing me what they found. By the way, I gave the description first what they should look for in a fine rock that we can use for the craft. That way, you are also training their mind.
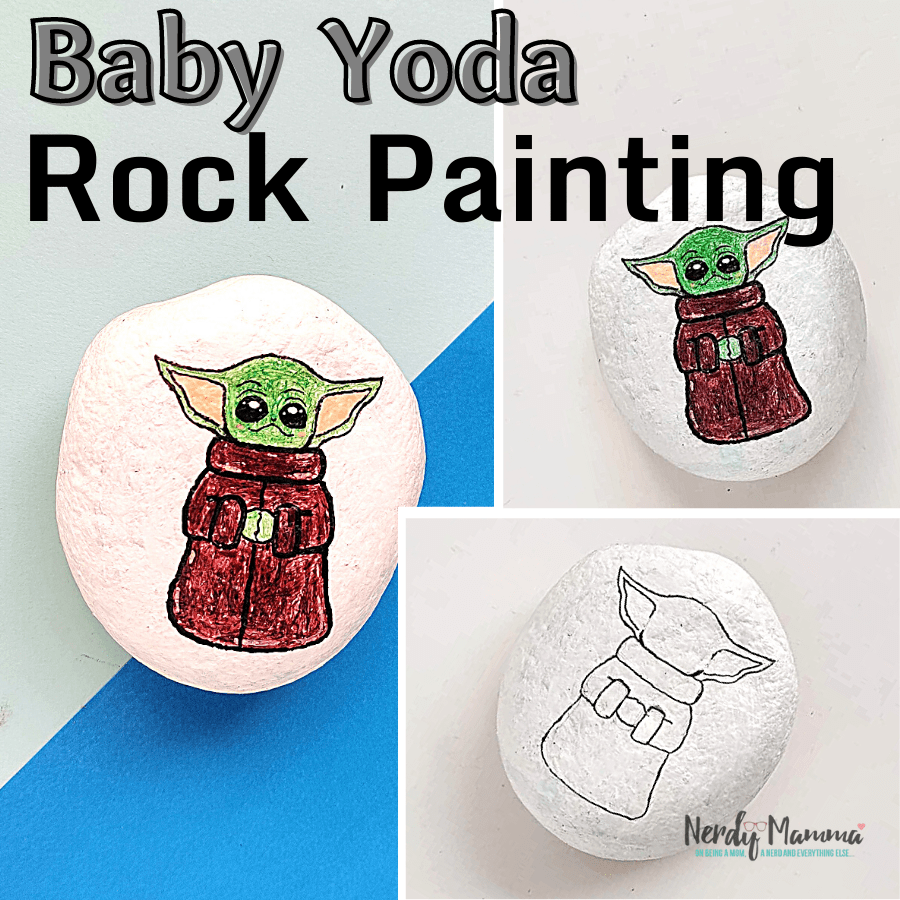
To make the story short, we got the rocks needed. then I showed them what to do. I got this Yoda Template to make it easier for you to draw Baby Yoda. But if you are good at drawing, just draw Yoda on the stone.
We have the stones washed first. And of course, our hands, too. Because we are using paints, I have to put some old newspapers to cover the table. When the stones dried up completely, we painted them white. White is a good background color for the Young Yoda.
While we wait for the painted stones to dry up, we are enjoying our snacks.
To continue, I drew Yoda on the surface of the rock using a pencil. Then I let the kids color them.
I have the full step by step instructions below on what to do. They’re so easy to follow. It doesn’t need to be perfect so don’t worry if you are not good at drawing. that’s what the Yoda Templates are for.
What to do with the Baby Yoda Rock Painting
If you are asking what to do with these Baby Yoda Rock Paintings afterward? Well, I used one as a paperweight. They can also be placed on a shelf along with the other Star Wars collections. They can be on the pots placed around the plants. But my kids loved them on display
If you are yet to get the supplies first, Pin this Baby Yoda Rock Painting activity into your favorite craft Pinterest Board so it will very easy for you to get back when you are ready.

The Supplies:
- Stones or small rocks.
- Paint.
- Paintbrush.
- Marker.
- Pencil.
The Instructions:
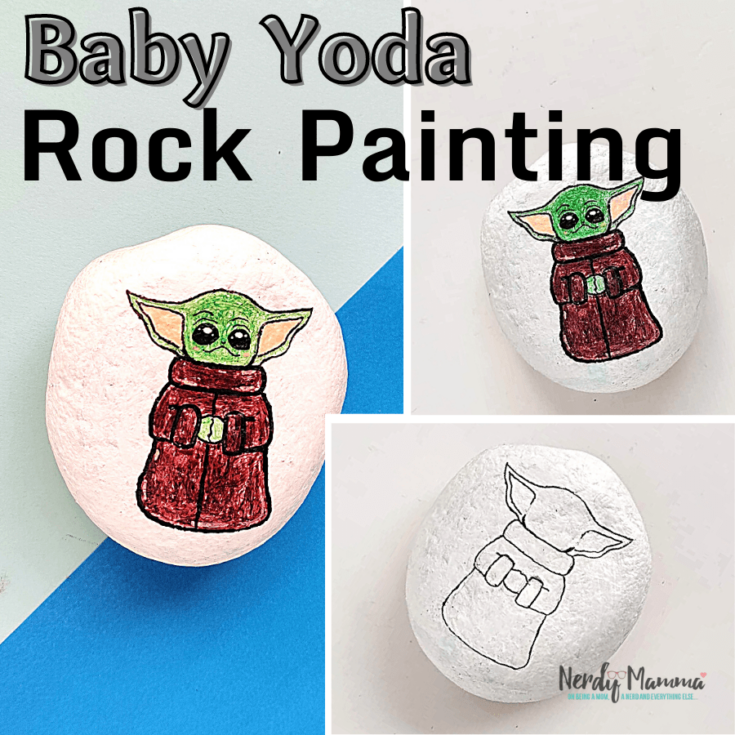
Step 1: Take a clean stone, and paint the whole stone using white paint. Allow the paint to dry.
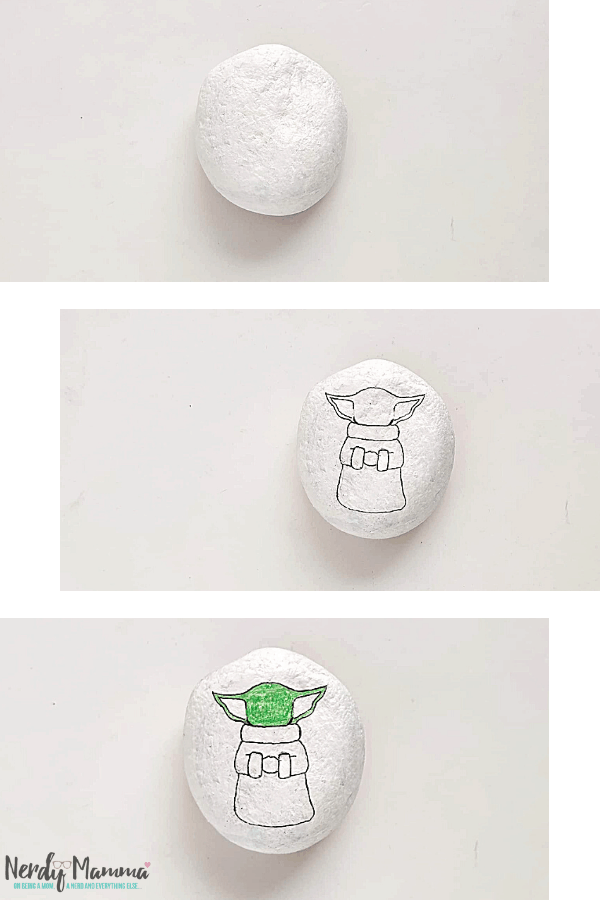
Step 2: Use the template as an example to draw Yoda’s body.
First, use a pencil or a marker pen to draw the outlines. Then Draw over the outline using black paint.
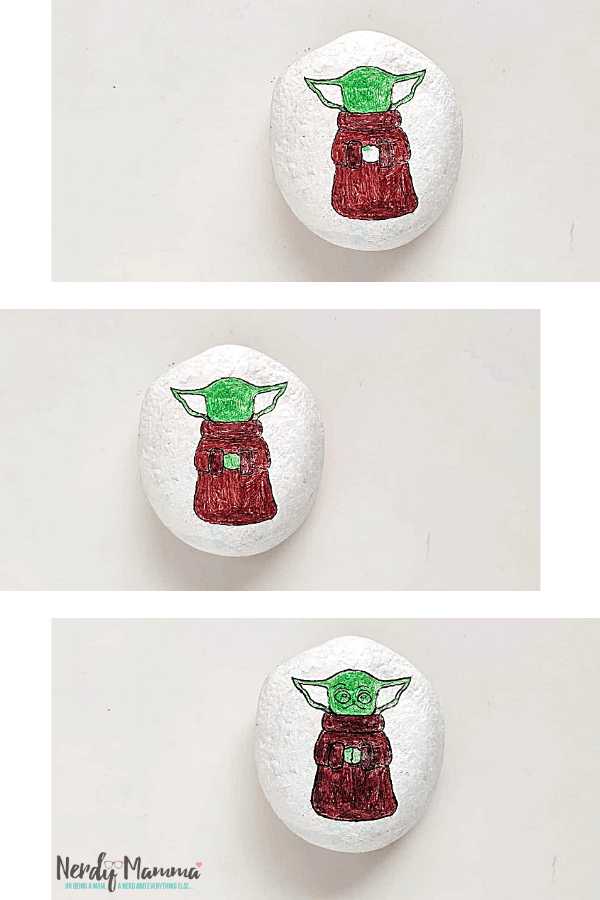
Step 3: Use green paint to fill in the head’s outline. Allow the paint to dry.
Step 4: Then use brown paint to fill in the Yoda’s cloak. Leave it to dry once again.
Step 5: Now use green paint again to fill in the Yoda’s hands outline.
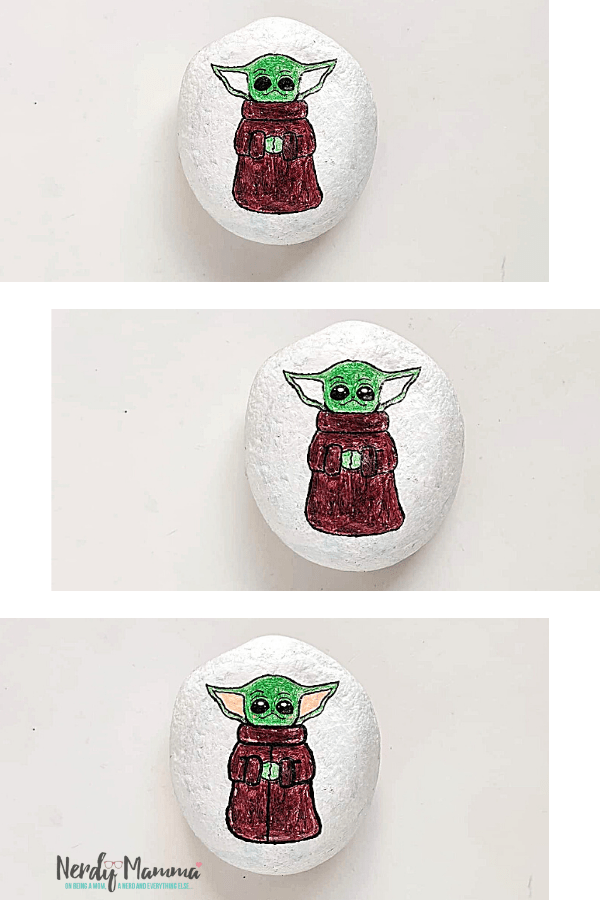
Step 6: Then draw the Yoda’s eyebrows and eyes using black paint.
Step 7: Fill in the eyes outline using the same black paint.
Step 8: Then use white paint to draw to dots in the eyes to complete the eyes.
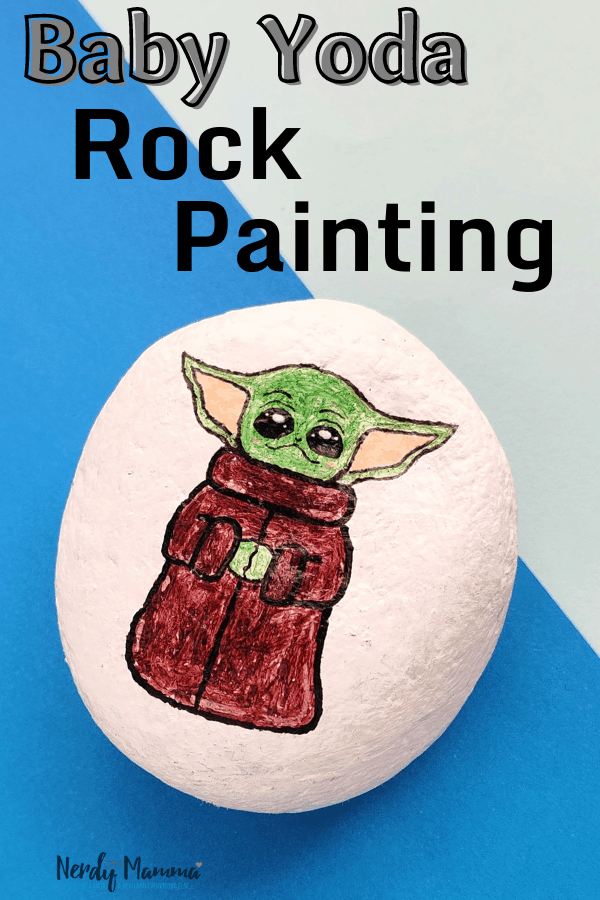
Step 9: Finish it off by clouring the insides of the ears using a light pink colour.
Baby Yoda Rock Painting
This Baby Yoda Rock Painting Craft brings all the fun in creativeness. This activity will surely be loved by kids right from the start.
Materials
- Stones or small rocks.
- Paint.
- Paintbrush.
- Marker.
- Pencil.
Instructions
Step 1:
Take a clean stone, and paint the whole stone using white paint.
Allow the paint to dry.
Step 2:
Use the template as an example to draw the Yoda’s body.
First, use a pencil or a marker pen to draw the outlines. Then Draw over the outline using black paint.
Step 3:
Use green paint to fill in the head’s outline.
Allow the paint to dry.
Step 4:
Use brown paint to fill in the Yoda’s cloak.
Leave it to dry once again.
Step 5:
Now use green paint again to fill in the Yoda’s hands outline.
Step 6:
Now draw the Yoda’s eyebrows and eyes using black paint.
Step 7:
Fill in the eyes outline using the same black paint.
Step 8:
Then use white paint to draw to dots in the eyes to complete the eyes.
Step 9:
Finish it off by clouring the insides of the ears using a light pink colour.
Did you enjoy making the craft? I sure did.
I have here some Star Wars Snacks that I’m sure you’ll also like to try. Check them out.
Star Wars Chocolates

Star Wars Rogue One Vegan Toffee Ice Cream
Chewbacca Donuts, the Chocolatiest Donuts in the Universe

