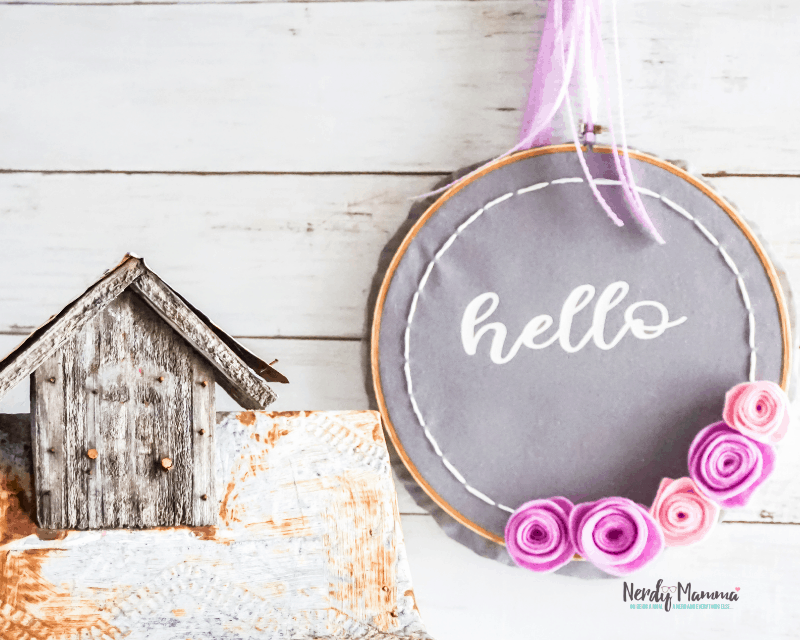
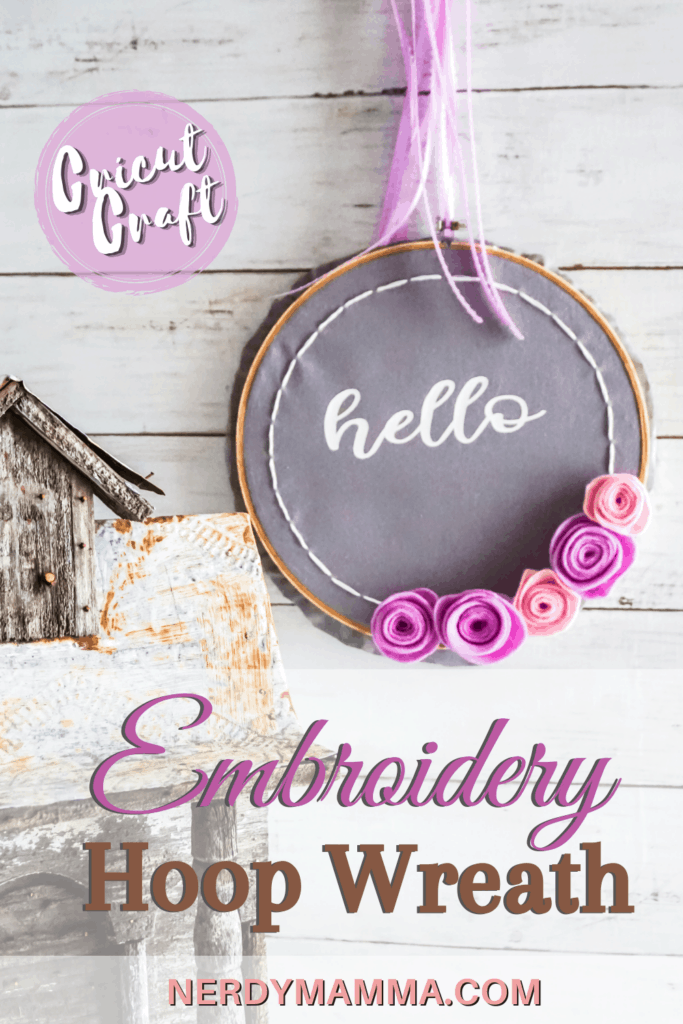
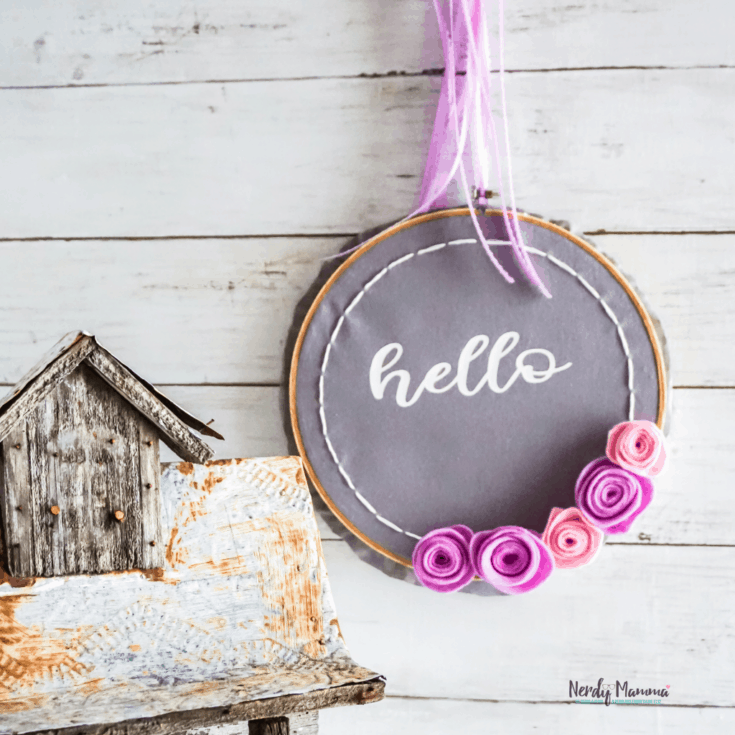
This Cricut machine of mine is doing really well when it comes to crafts. It made my DIY crafts a lot faster and a lot better. Just like this pretty Embroidery Hoop Wreath Cricut Craft.
I found an embroidery hoop when I was rummaging some old stocks. And I couldn’t remember when did I last used it but I knew I tried an embroidery project before. I’m not that good though, but at least I can do a few basic stitches. Heh!.
So, I thought I should use this in a Cricut Craft I was thinking about. That’s how I made this Embroidery Hoop Wreath!
Ever since I got used to my Cricut machine, I have endless crafts and DIY projects in mind that I’d like to do. That includes wreaths.
I enjoy making wreaths whenever the season or occasion calls for. I remember a couple of years back when I made a Simple Unicorn Wreath at that time I and my kids are really enjoying anything Unicorn. We still love Unicorns. You know me (grinning)!
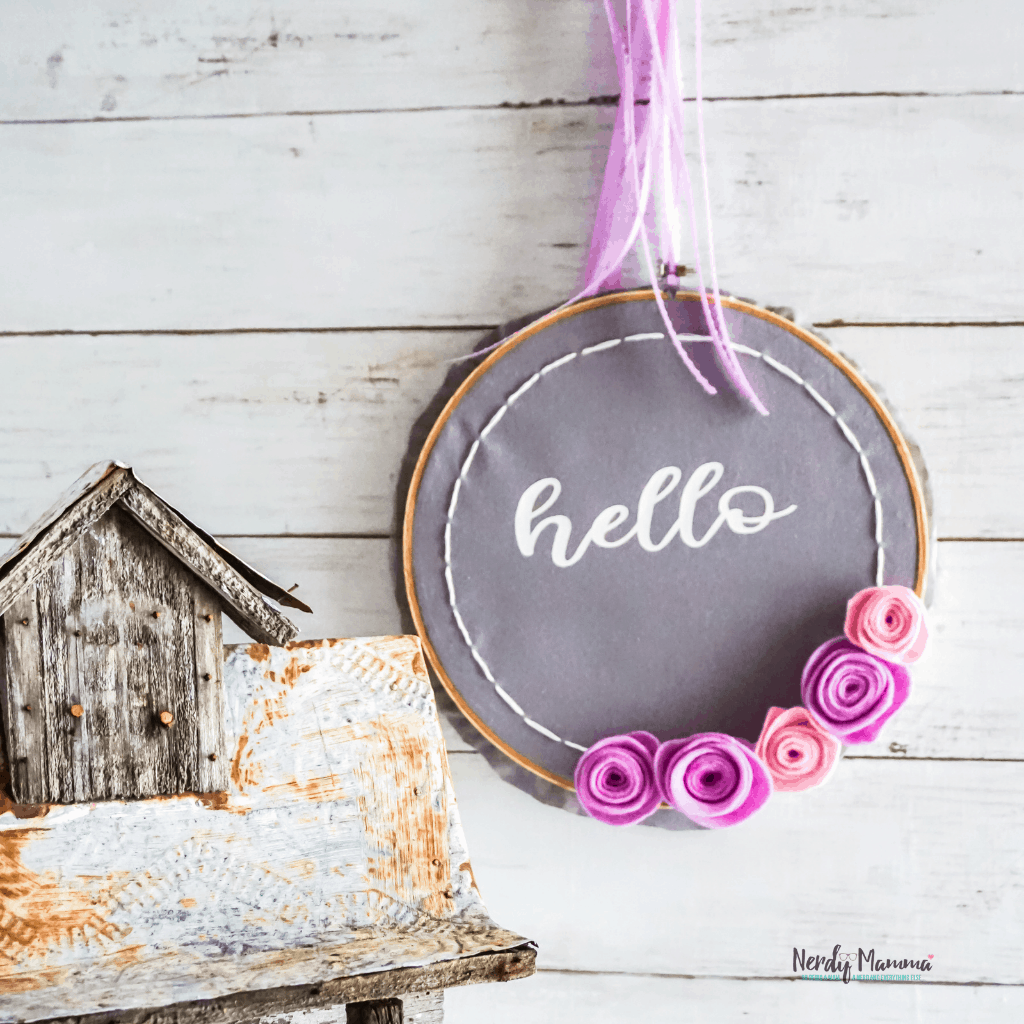
But this Embroidery Hoop Wreath is great for any occasion. excellent as wall decor, on the door, or as a gift for someone. And if you embroider better, you can do your own design.
Making the Embroidery Hoop Wreath
Wreaths are one of the favorite wall and door decors. Although they can easily be bought, a lot of people are into DIYs. Besides they can save their money, they can put on their personal touch on their creations and show off their skills on crafts. At the same time, it’s enjoyable, too.
This pretty Embroidery Hoop Wreath is one awesome Cricut craft project that can be made easily. If you have an old embroidery hoop that hasn’t been used for some time, use it here. Otherwise, it’s available in most craft and online with minimal cost.
To make this craft, have the supplies ready first. They are listed below. The tools that you’ll be using are also on the list.
Supplies
- 1 10-inch Embroidery Hoop
- 14-inch Square Grey Cotton Fabric
- White Heat Transfer Vinyl
- Lavender ¼-inch Ribbon
- Embroidery Thread in White
- Purple and Pink Craft Felt
Tools
- Cricut Explore Air 2 or Cricut Maker
- Cricut Easy Press Mini
- Scissors
- Hot Glue Gun & Glue
- Embroidery Needle
Instructions in Making the Embroidery Hoop Wreath
I have the instructions easy to understand with the corresponding images as well. So excited to share this activity with y’all!
To begin with, disassemble the embroidery hoop.
Place the grey fabric squarely in the center of the embroidery hoop and reassemble the embroidery hoop around the grey fabric, trapping it in between the two rings.
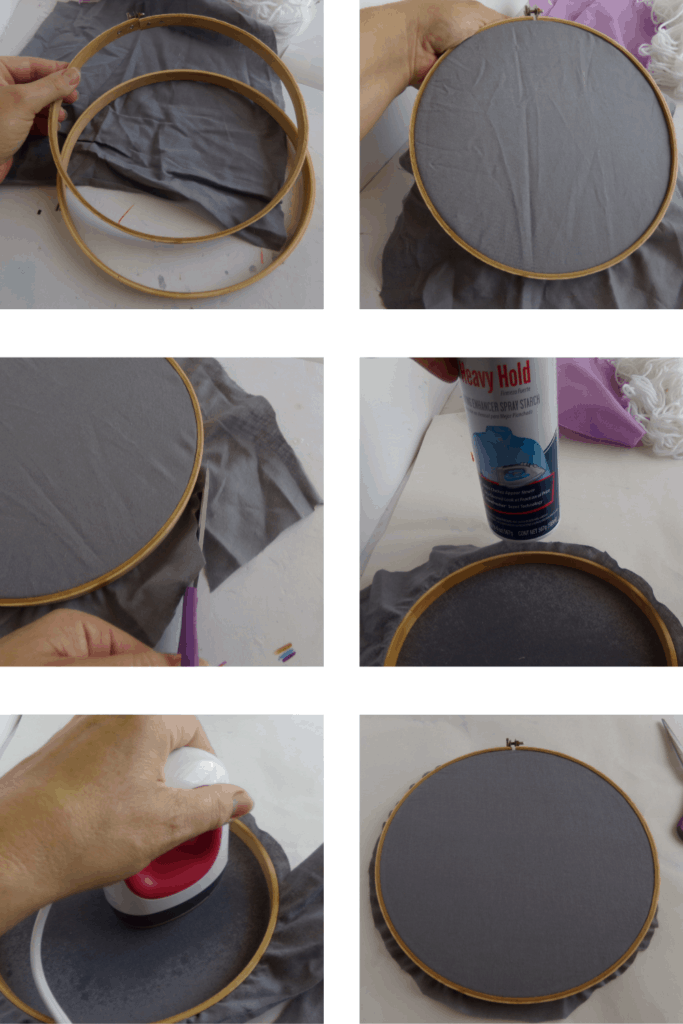
Using the white embroidery thread and needle, make a running stitch around the outside edge of the grey fabric in ½-inch lengths of thread showing, about ½ inch from the embroidery hoop.
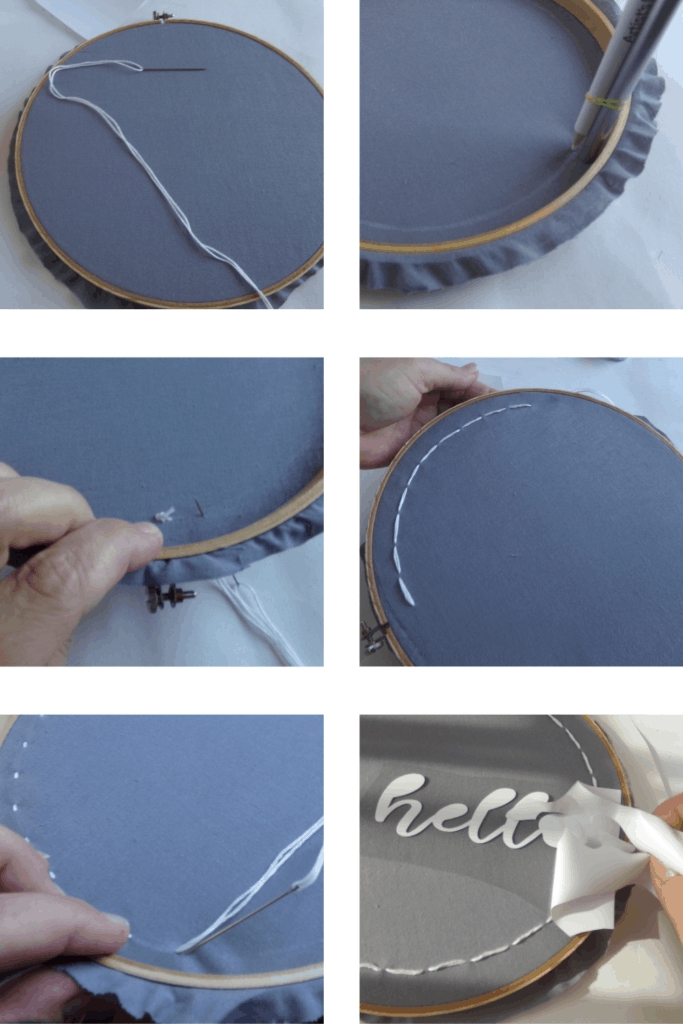
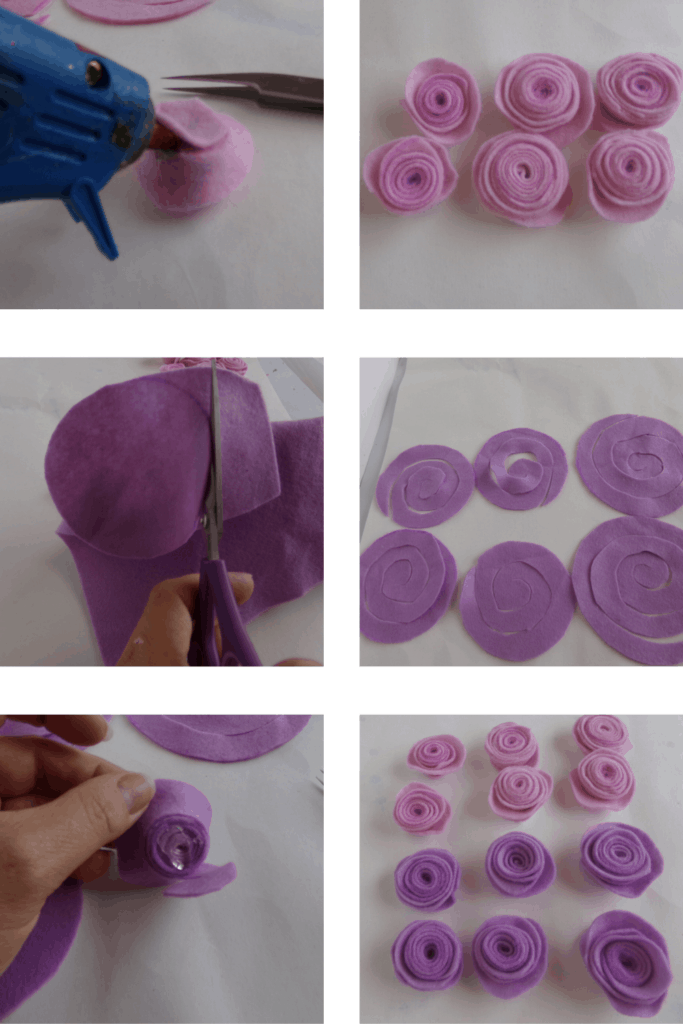
Download the cut file and upload it to Cricut Design Space. Follow the prompts to cut the lettering from the heat transfer vinyl and 3-4 spiral shapes for flowers from the purple and pink felt. Don’t forget to mirror your lettering design so you don’t waste any vinyl. When you are cutting the felt flower spirals, don’t forget to bond your felt if using a Cricut Explore Air 2 as opposed to the Cricut Maker.
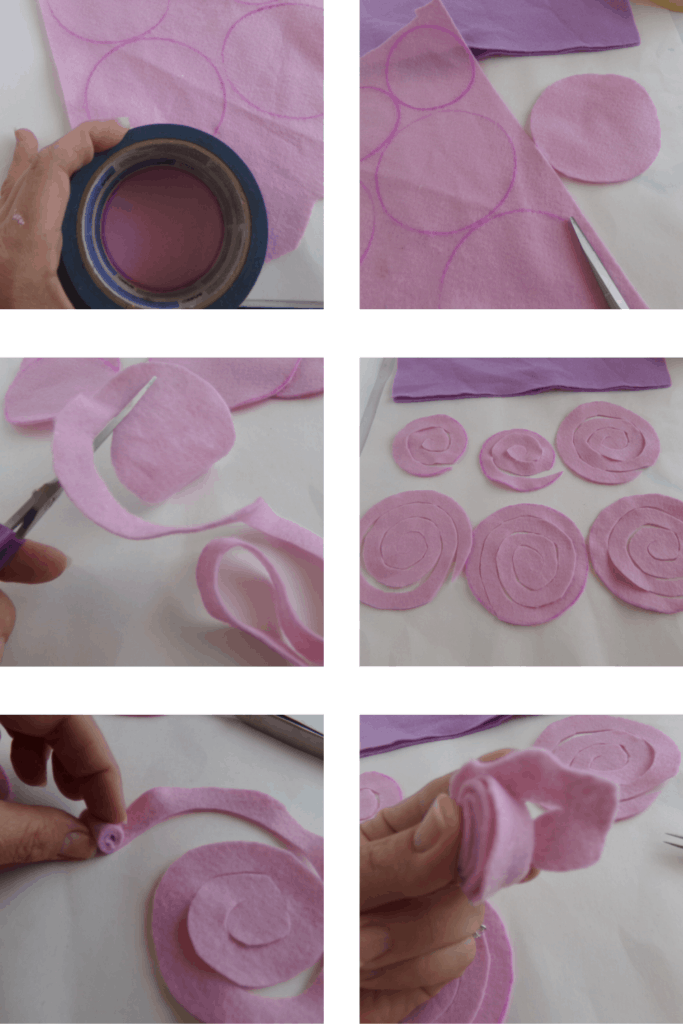
Make your roses by tightly coiling the spiral shapes in on themselves, making a tight coil. Hot glue the bottom of the coiled rose. Hot glue the roses onto the embroidery hoop on one side along the bottom.
Weed your lettering design and place it face-down in the center of the cotton fabric square.
Heat press the design in place, gently removing the backing sheet after the heating process is over and the design has cooled.
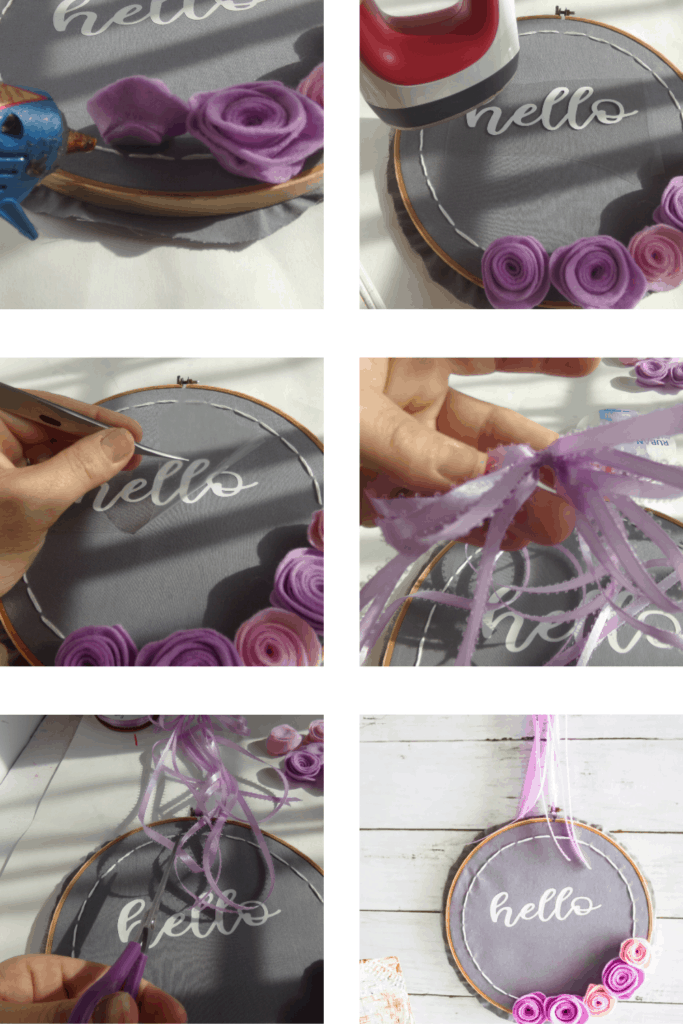
Tie the ribbon onto the top of the embroidery hoop and hang on the door!
While still completing the materials and tools needed, or prefer to do it later, Pin this activity into your Summer Crafts Pinterest Board to make it easier for you to get back.
Embroidery Hoop Wreath Cricut Craft
This pretty Embroidery Hoop Wreath Cricut Craft is such a classic with a touch of modern. Excellent on walls, doors, and as a gift.
Materials
- 1 10-inch Embroidery Hoop
- 14-inch Square Grey Cotton Fabric
- White Heat Transfer Vinyl
- Lavender ¼-inch Ribbon
- Embroidery Thread in White
- Purple and Pink Craft Felt
Tools
- Cricut Explore Air 2 or Cricut Maker
- Cricut Easy Press Mini
- Scissors
- Hot Glue Gun & Glue
- Embroidery Needle
Instructions
- Disassemble the embroidery hoop.
- Place the grey fabric squarely in the center of the embroidery hoop and reassemble the embroidery hoop around the grey fabric, trapping it in between the two rings.
- Using the white embroidery thread and needle, make a running stitch around the outside edge of the grey fabric in ½-inch lengths of thread showing, about ½ inch from the embroidery hoop.
- Download the cut file and upload it to Cricut Design Space. Follow the prompts to cut the lettering from the heat transfer vinyl and 3-4 spiral shapes for flowers from the purple and pink felt. Don’t forget to mirror your lettering design so you don’t waste any vinyl. When you are cutting the felt flower spirals, don’t forget to bond your felt if using a Cricut Explore Air 2 as opposed to the Cricut Maker.
- Make your roses by tightly coiling the spiral shapes in on themselves, making a tight coil. Hot glue the bottom of the coiled rose. Hot glue the roses onto the embroidery hoop on one side along the bottom.
- Weed your lettering design and place it face-down in the center of the cotton fabric square.
- Heat press the design in place, gently removing the backing sheet after the heating process is over and the design has cooled.
- Tie the ribbon onto the top of the embroidery hoop and hang it on the door!
Have a look at these crafts, too.
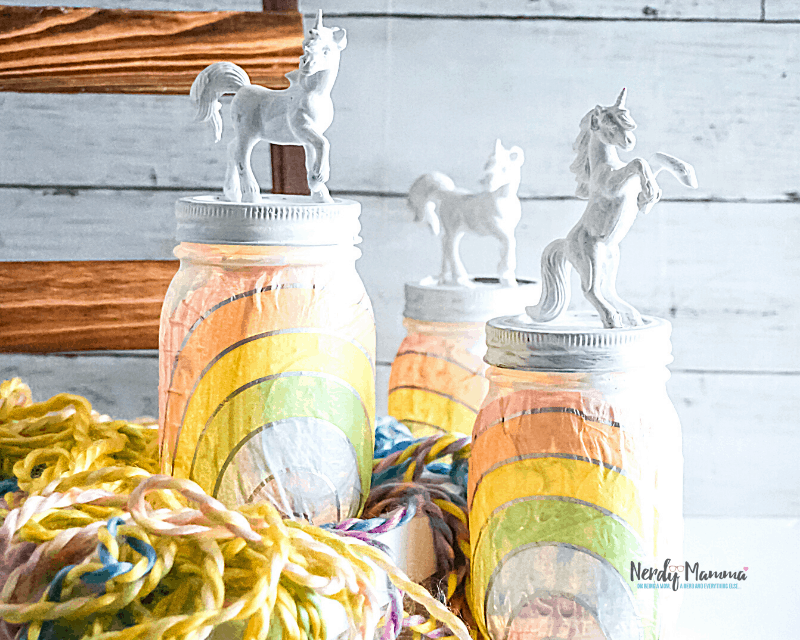
Rainbow Unicorn Mason Jar Nightlights
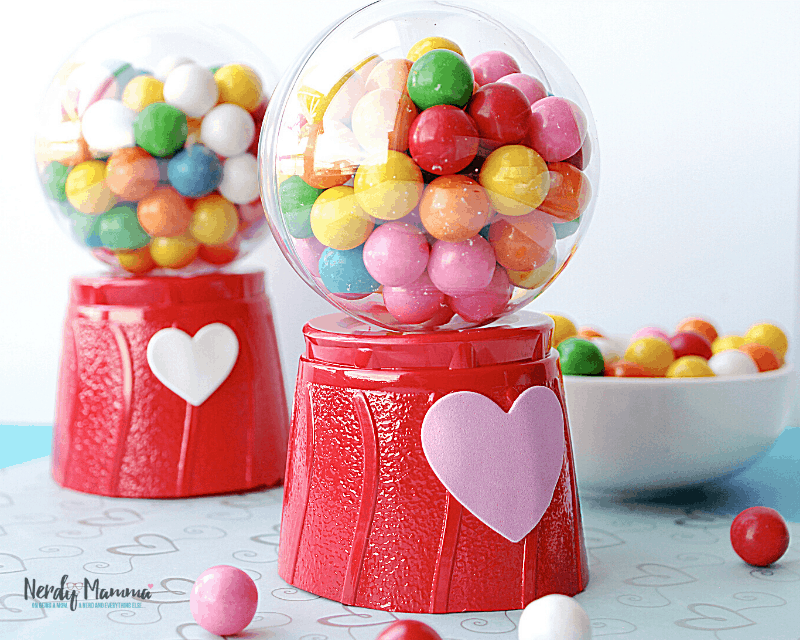
Valentines Mini Gum Ball Machines
How to Make an Easy Witch’s Fairy House
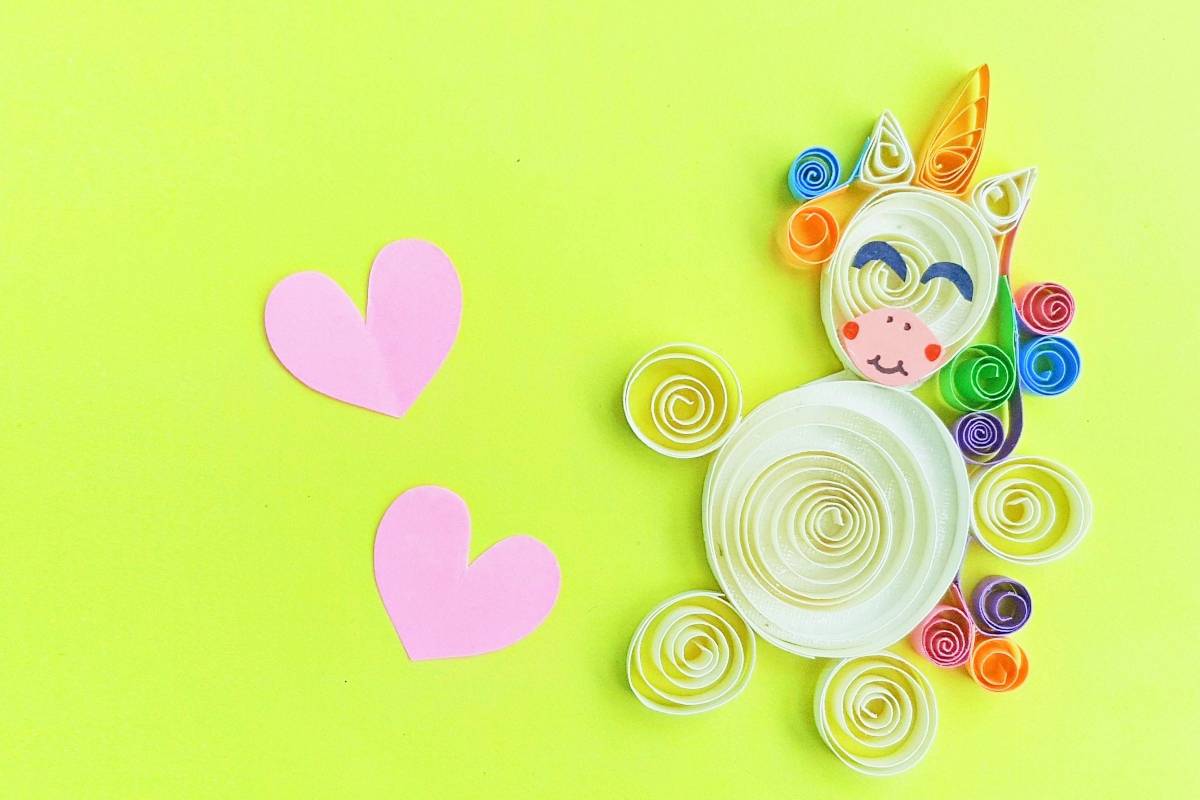
Paper Quilled Unicorn Craft