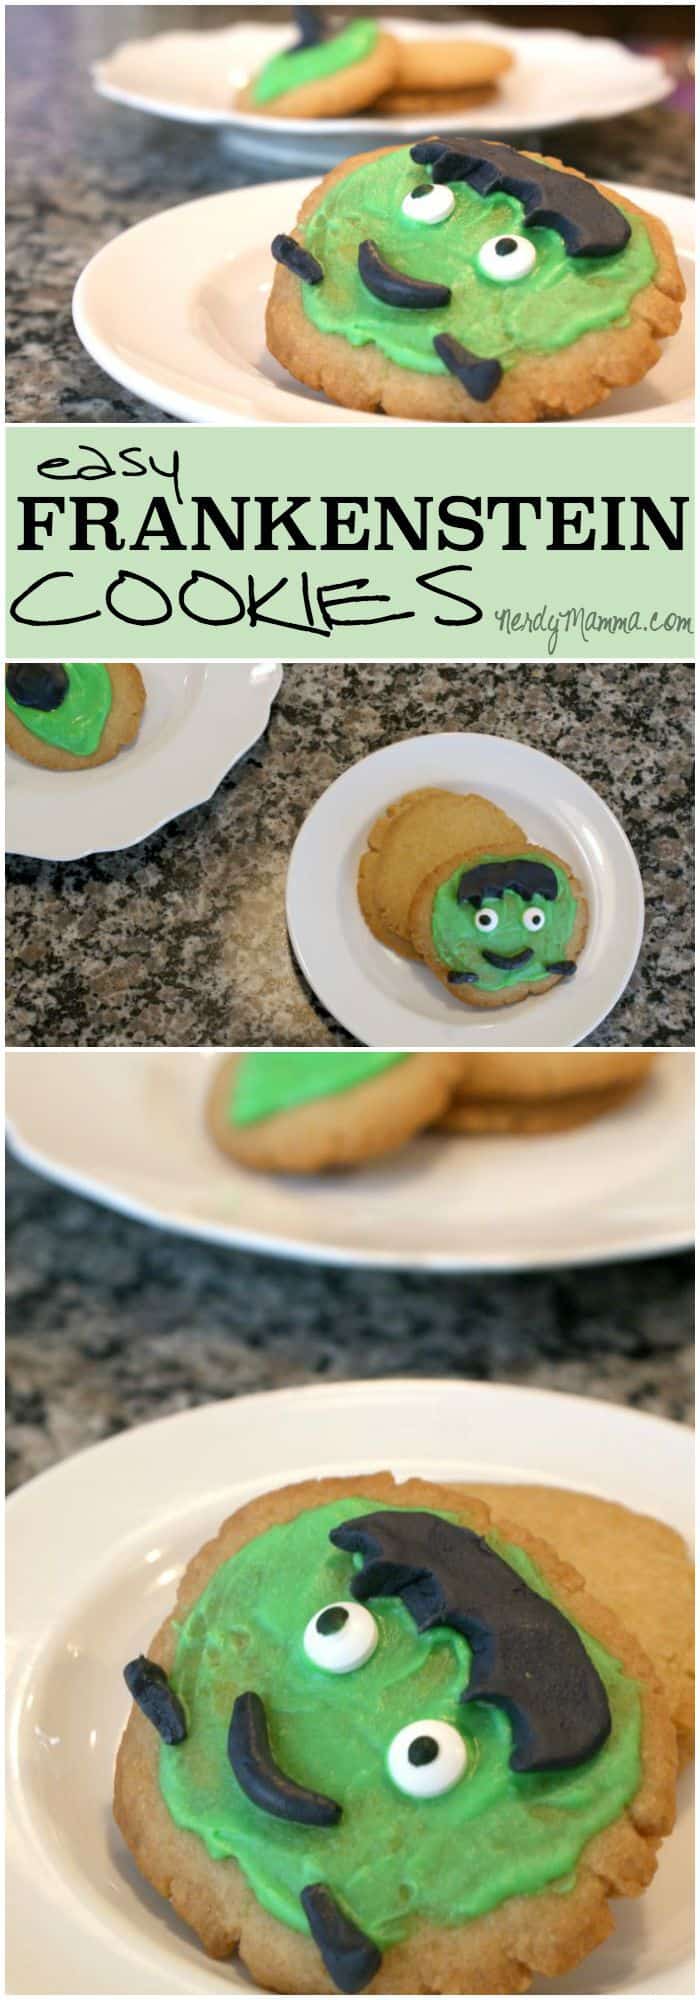
Cooking with little kiddos is hard–they like want you to pay attention to them instead of checking on the oven. What gives?! But I made a promise to my (then imaginary) kids when I was first looking to expand our family many years ago: There will be holiday treats around our house. See, my mom made all kinds of fun holiday treats, especially for Halloween. She and I had so much fun decorating cookies and cupcakes together and just, generally, being silly. I want that for my kids. So, my toddler and I, we took our first foray into this fun challenge this week. We made Easy Frankenstein Cookies. And by easy, I mean, my daughter (as a 2 year old), really did help me (albeit messily). That’s how ridiculously easy they are. Then we ate them. Now, they are no more. You’ll have to make your own. Sorry.
Ingredients for Easy Frankenstein Cookies
Cookies
- 4 cups flour
- 1 tspn baking soda
- 1/2 tspn baking powder
- 1 tspn vinegar
- 1 cup coconut oil
- 1 1/2 cup sugar
- 1 tspn vanilla extract
- 1/3 cup apple sauce
Icing
- 1/2 cup cream from a can of coconut milk (refrigerate can for 2 hours or overnight to achieve maximum separation, then just scoop cream out of the can, leaving the coconut water for later consumption)
- 1/3 cup powdered sugar
- 3-6 drops green gel food coloring (however many drops you want to achieve your version of Frankie’s green skin)
Decorations
- 1 cup white modeling chocolate (So, the hair, smile and bolt decorations are made of modeling chocolate. This recipe can be completely vegan, if you can buy/make some vegan modeling chocolate. I wasn’t planning on making these (it was just an idea that happened), so I didn’t have anything but non-vegan “normal” modeling chocolate on hand.) An easy recipe for making modeling chocolate can be found here.
- 5 drops of black gel food coloring
- 24 candy eyeballs
How to Make Easy Frankenstein Cookies
Cookies
- Preheat oven to 350-degrees.
- Mix dry ingredients, except sugar, together in a medium bowl. Set aside.
- Cream coconut oil and sugar together in a second medium bowl.
- Add vanilla, vinegar and apple sauce to the sugar mixture and blend well.
- Add dry ingredients into the wet mixture in 1/2 cup increments.
- Mix until smooth.
- Make balls of cookie (approximately 2 tablespoons in size) and place on a greased cookie sheet at least 2 inches apart.
- Smoosh balls for maximum spread.
- Bake for 8-12 minutes or until golden brown.
- Remove from oven and allow to cool for approximately 2 minutes before moving them to a wire rack to cool completely.
- Cool COMPLETELY before icing.
Icing
- With a hand mixer, in a medium bowl, mix cream, sugar and food coloring together on high for approximately 2-3 minutes until icing is stiff.
- It’s ready. Not sure why I needed to add a “2”.
Decorations
- By hand, mix your food coloring into the modeling chocolate thoroughly, until the color is consistent throughout.
- Using your modeling chocolate, make the following:
- 12 – 2-inch long rectangles no more than 1/2-inch wide
- 12 – 1/2-inch long rolls
- 24 – 1/3-inch long rolls
- To make the “hair pieces”, take the 2-inch long rectangles and pinch one long side several times to create the waves of the hair.
- To make the smiles, take the 1/2-inch long rolls and bend them a little. Heh.
- To make the bolts, smoosh one end.
Putting Together Your Easy Frankenstein Cookies
This should be fairly self-explanatory, but just in case:
- Place about 1/2 tablespoon of icing on each cookie, spreading it around until completely covered, leaving 1/3-inch clean around the edges for easy grabbing.
- Place 1 “hair piece” on the top of the icing.
- Place 2 eyeballs in the upper-center of the icing.
- Place a smile in the lower-center of the icing.
- Place 2 bolts in the lower part of the icing.
- Put the cookie in the fridge for 30 minutes to “set” the icing. Or don’t. I just left mine on the counter overnight (I know, I’m gross sometimes) before dropping these in the kiddo’s lunch and they turned-out great.
- EAT THAT MONSTER!!!
Easy Frankenstein Cookies
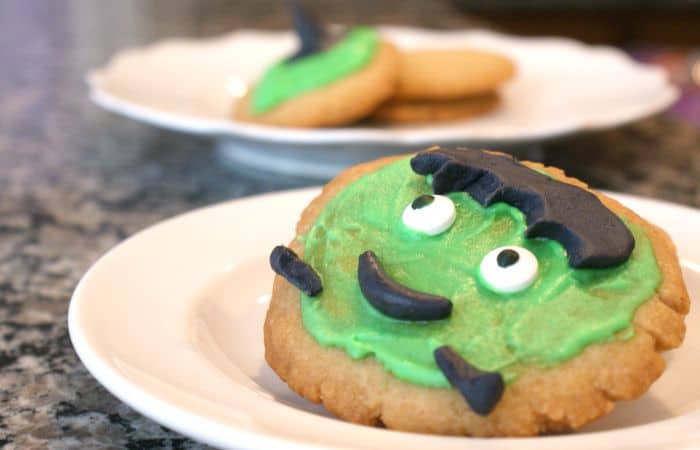
Easy Frankenstein Cookies. And by easy, I mean, my daughter (as a 2 year old), really did help me (albeit messily). That’s how ridiculously easy they are.
Ingredients
- Cookies
- 4 cups flour
- 1 tspn baking soda
- 1/2 tspn baking powder
- 1 tspn vinegar
- 1 cup coconut oil
- 1 1/2 cup sugar
- 1 tspn vanilla extract
- 1/3 cup apple sauce
- Icing
- 1/2 cup cream from a can of coconut milk, refrigerate can for 2 hours or overnight to achieve maximum separation, then just scoop cream out of the can, leaving the coconut water for later consumption
- 1/3 cup powdered sugar
- 3-6 drops green gel food coloring, however many drops you want to achieve your version of Frankie’s green skin
- Decorations
- 1 cup white modeling chocolate, So, the hair, smile and bolt decorations are made of modeling chocolate. This recipe can be completely vegan, if you can buy/make some vegan modeling chocolate. I wasn’t planning on making these (it was just an idea that happened, so I didn’t have anything but non-vegan “normal” modeling chocolate on hand.) An easy recipe for making modeling chocolate can be found here.
- 5 drops of black gel food coloring
- 24 candy eyeballs
Instructions
- Cookies
- Preheat oven to 350-degrees.
- Mix dry ingredients, except sugar, together in a medium bowl. Set aside.
- Cream coconut oil and sugar together in a second medium bowl.
- Add vanilla, vinegar and apple sauce to the sugar mixture and blend well.
- Add dry ingredients into the wet mixture in 1/2 cup increments.
- Mix until smooth.
- Make balls of cookie (approximately 2 tablespoons in size) and place on a greased cookie sheet at least 2 inches apart.
- Smoosh balls for maximum spread.
- Bake for 8-12 minutes or until golden brown.
- Remove from oven and allow to cool for approximately 2 minutes before moving them to a wire rack to cool completely.
- Cool COMPLETELY before icing.
- Icing
- With a hand mixer, in a medium bowl, mix cream, sugar and food coloring together on high for approximately 2-3 minutes until icing is stiff.
- It’s ready. Not sure why I needed to add a “2”.
- Decorations
- By hand, mix your food coloring into the modeling chocolate thoroughly, until the color is consistent throughout.
- Using your modeling chocolate, make the following:
- – 2-inch long rectangles no more than 1/2-inch wide
- – 1/2-inch long rolls
- – 1/3-inch long rolls
- To make the “hair pieces”, take the 2-inch long rectangles and pinch one long side several times to create the waves of the hair.
- To make the smiles, take the 1/2-inch long rolls and bend them a little. Heh.
- To make the bolts, smoosh one end.
- This should be fairly self-explanatory, but just in case:
- Place about 1/2 tablespoon of icing on each cookie, spreading it around until completely covered, leaving 1/3-inch clean around the edges for easy grabbing.
- Place 1 “hair piece” on the top of the icing.
- Place 2 eyeballs in the upper-center of the icing.
- Place a smile in the lower-center of the icing.
- Place 2 bolts in the lower part of the icing.
- Put the cookie in the fridge for 30 minutes to “set” the icing. Or don’t. I just left mine on the counter overnight (I know, I’m gross sometimes) before dropping these in the kiddo’s lunch and they turned-out great.
- EAT THAT MONSTER!!!
Check Out These Creepy, Delicious, and/or Gross Halloween Treats:
Jack Skellington Hot Cocoa Bombs
Vampire Teeth Cupcakes

Mummy Macarons
