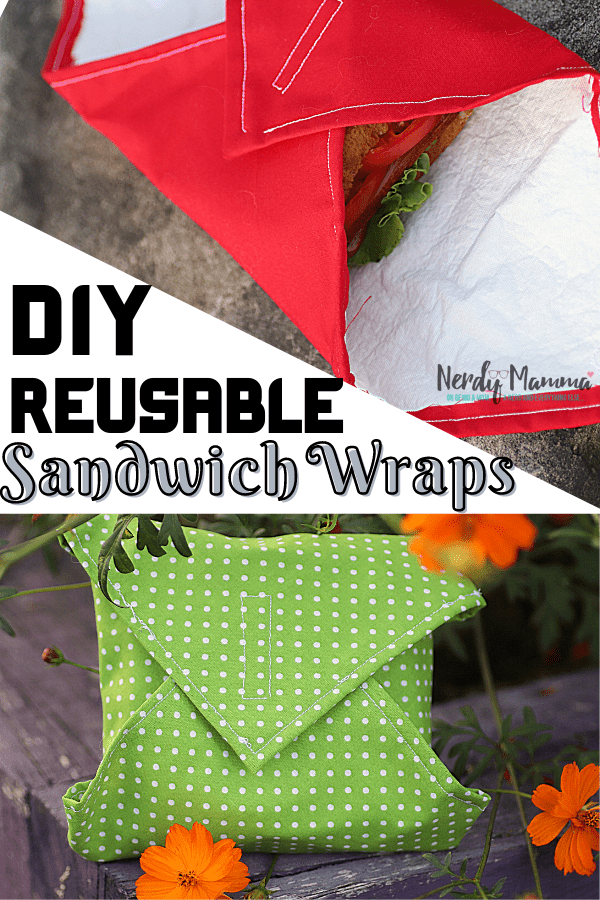
Moms like me like to prepare food for their kids when they go to school. This is to make sure they eat fresh, healthy foods. For their sandwiches, I usually wrap them up. And here is where my DIY Reusable Sandwich Wraps come in.
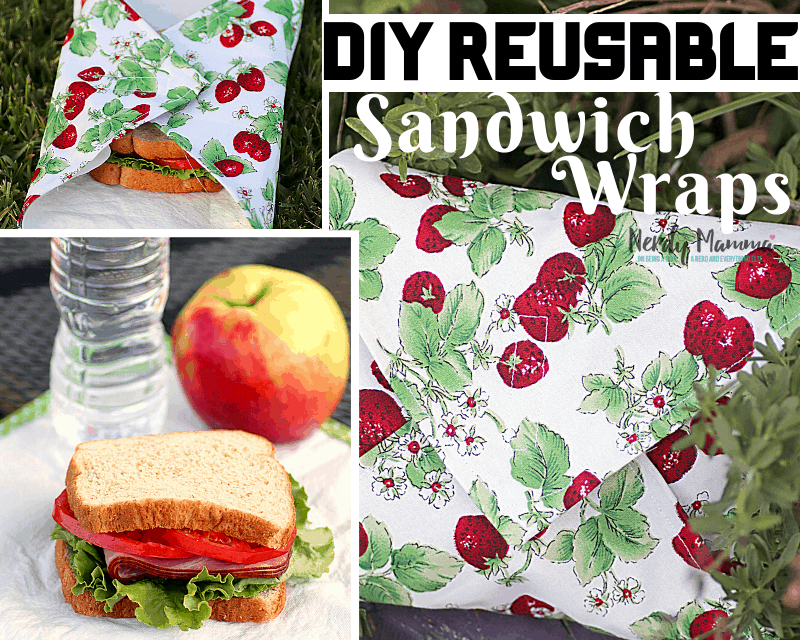
I like their foods to be attractive to them. Indeed, this DIY Reusable Sandwich Wraps can be colorful.
You can make them with your kid’s favorite color, and printed designs. They will surely love to bring their foods and eat them in their favorite wraps.
And because it is reusable (of course you have to clean or wash them after using), they help you save your budget. You don’t need to buy napkins and plastic wraps often to wrap your sandwiches.
And that makes it environmentally friendly, too. Because you are not producing more waste. Right?
If you are now thinking about what other sandwiches we can wrap with this DIY Reusable Sandwich Wraps. Have a look at these yummy Grilled Cheese Sandwiches recipes.
DIY Reusable Sandwich Wraps Step-by-step Tutorials
If you think this is not that easy, I have this tutorial below with step-by-step instructions. Surely, they are very easy to follow. Before you know it, you already have several wraps done so quickly.
Note: You may notice I have 2 sets of instructions. One is made captions with the images.
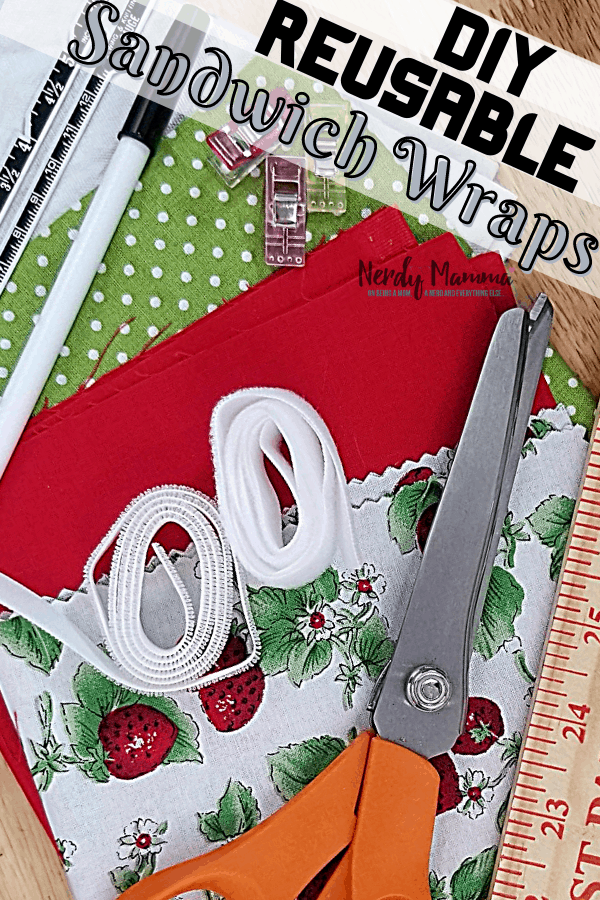
Supplies Needed for DIY Reusable Sandwich Wraps
Paid Links:
- 1/2 yard of your main cotton fabric or oilcloth fabric
- 1/2 yard of your complimentary cotton or oilcloth fabric (I got mine from Amazon)
- 1 yard of waterproof fabric (if using cotton fabric)
- Scissors (I prefer pinking shears
- All-purpose thread
- Wonder sewing clips
- 1 package of sew-on hook and loop Velcro strips
- Sewing machine
Instructions:
Measure, mark, and cut 1 piece of your main and 1 piece of your complimentary fabric 8 inches long by 8 inches wide OR 1 piece of fabric 16” long and 8” wide.
Cut one piece of waterproof fabric 16” long and 8” wide.
However, if you are using oilcloth, you don’t need the waterproof fabric. Skip that part of any of the steps that mention the waterproof fabric.
If using two pieces of fabric, with right sides facing each other, clip or pin along the bottom and sew with a 1/2” seam allowance. Iron your seams open.
More instructions below.
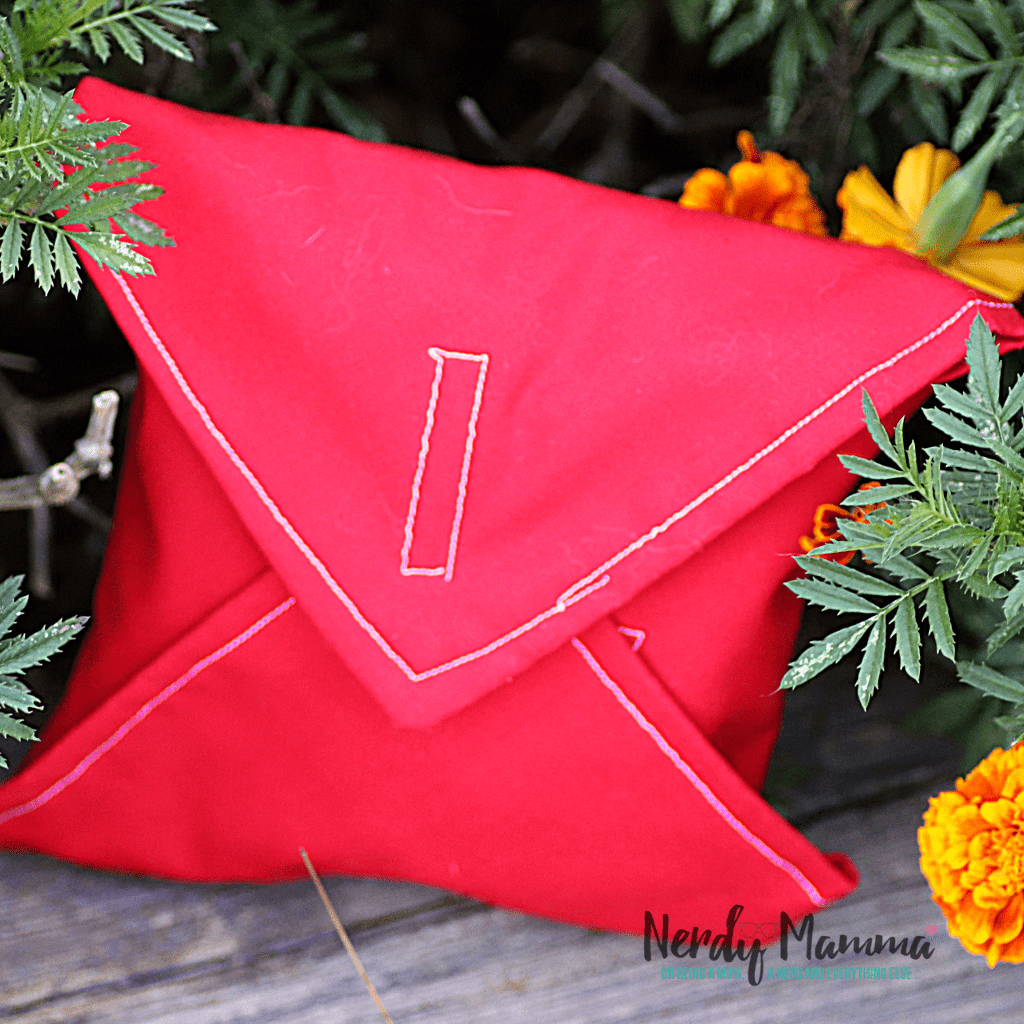
Fold 1″, and then 1″ again. Pin/clip in place except for the corners.
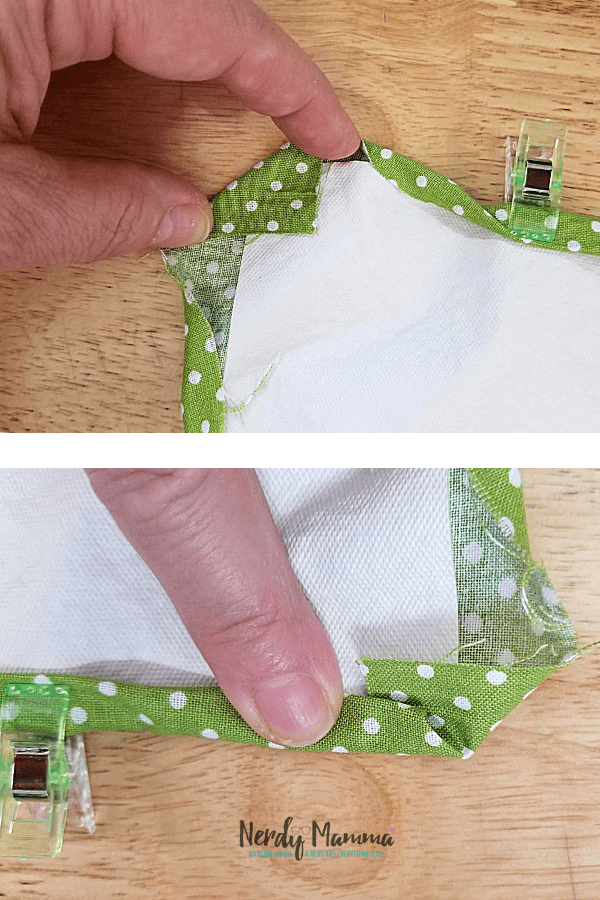
Fold each side down 1″…
Until they meet and you have a mitered corner.

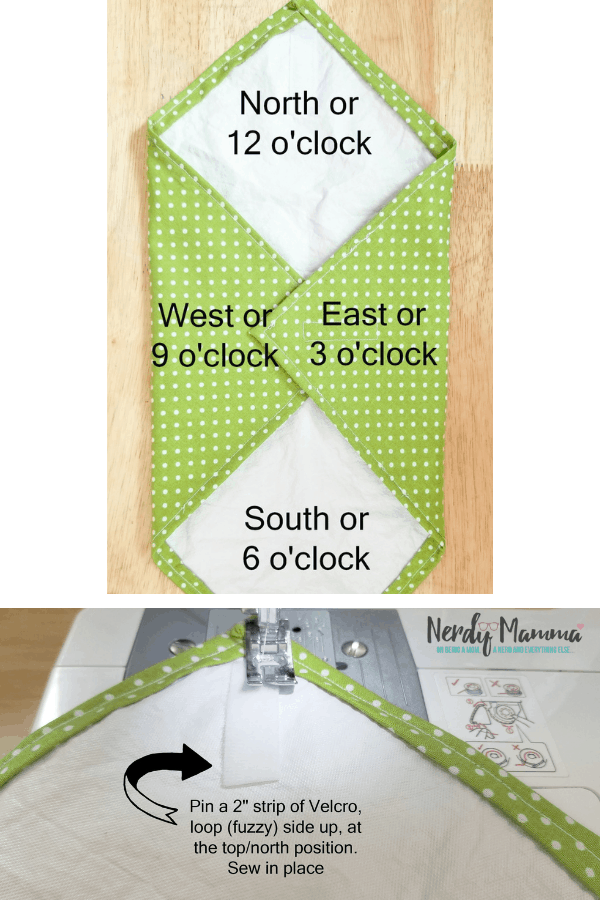
Turn your wrap in a diamond position.
Waterproof side up, pin velcro, loop/fuzzy side up to the north / top corner. Sew in place.
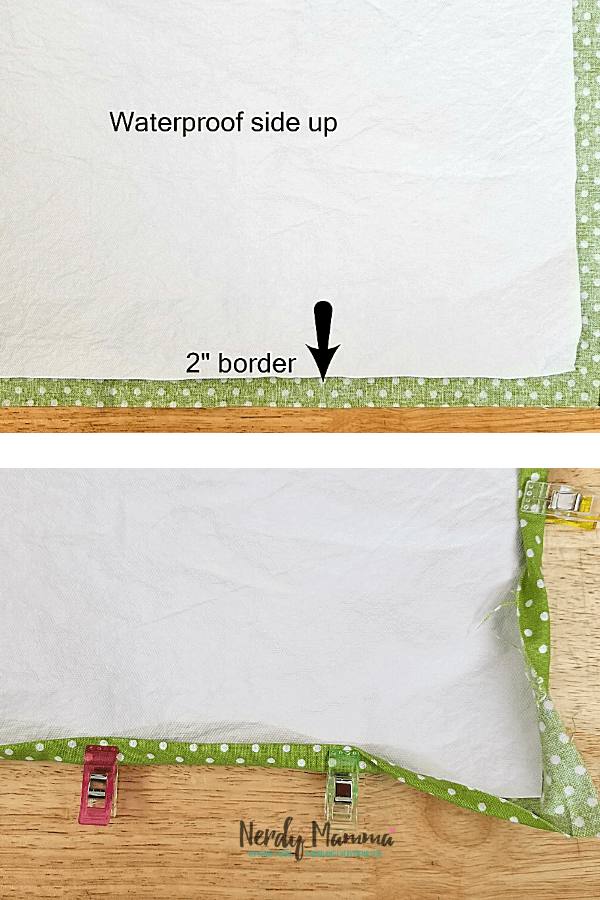
With the right side of your fabrics and the shiny side of your waterproof fabric facing each other, clip or pin all four sides. Sew with a 1/2” seam allowance all the way around, leaving a 3” opening to turn the fabric. Be sure to reinforce each end of this gap. Turn fabric and close the opening.
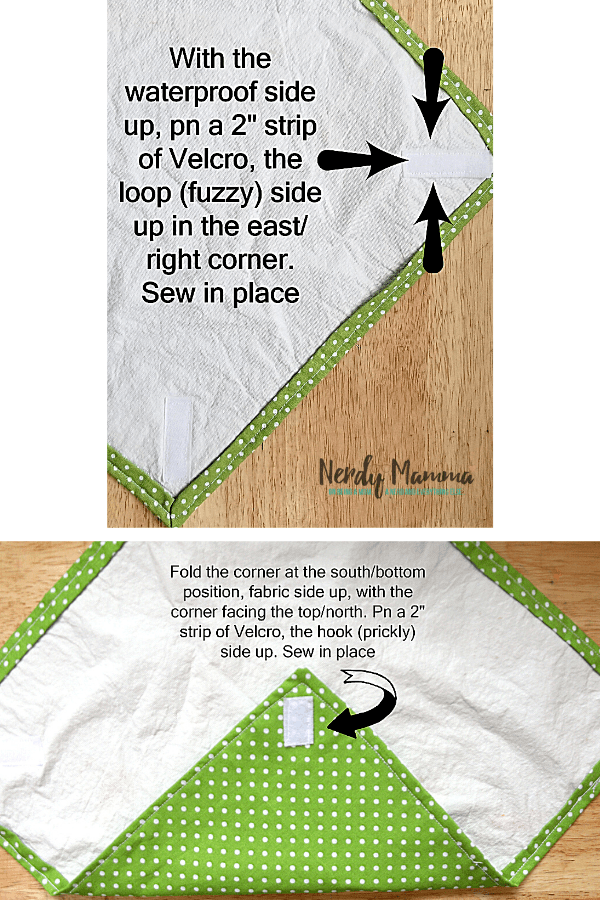
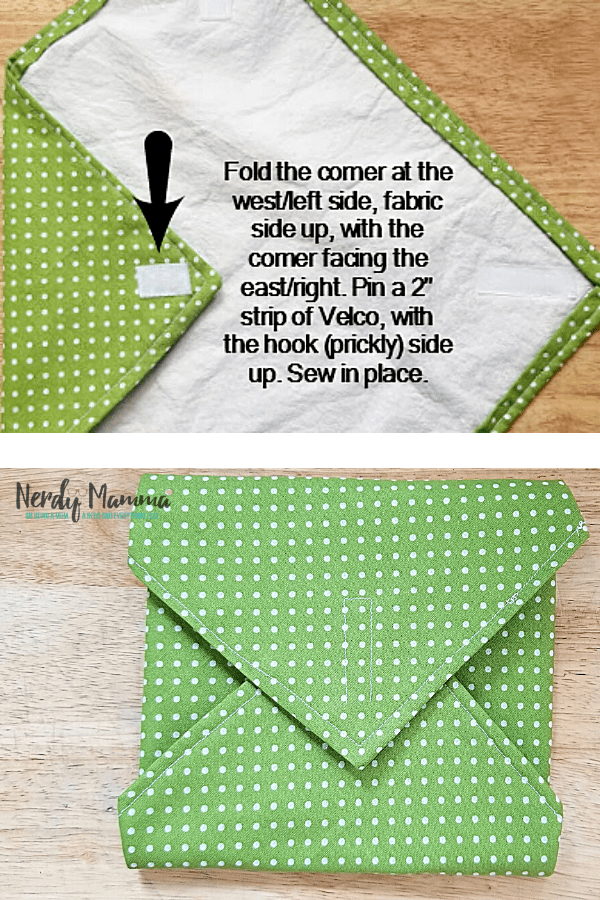
Fold the west/left corner, fabric side up. Pin Velcro hook/prickly side up. Sew in place.
We’re almost finished…
Next, measure two 6” pieces of the hook and loop Velcro. With a 1/4″ allowance from the top of the bag and 1/2” allowance on each side, with a 1/2” seam allowance, attach the Velcro on each end of the bag.
Fold the fabric in half, with waterproof side together, so Velcro is pressed together. Sew with a 1/4” seam allowance along the sides and across the bottom, reinforcing from where the bottom of the Velcro starts to the top, so about 1”.
So, how many wraps do you plan to make? Definitely, you will enjoy making this DIY. But, don’t forget to Pin this in your Pinterest board.
Easy DIY Reusable Sandwich Wraps
These easy DIY Reusable Sandwich Wraps are colorful and attractive. Perfect for kids and grown-ups who love to bring along sandwiches.
Materials
- 1/2 yard of your main cotton or oilcloth fabric (I got mine from Amazon)
- 1/2 yard of your complimentary cotton or oilcloth fabric (I got mine from Amazon)
- 1 yard of waterproof fabric (if using cotton fabric) (I got mine from Amazon)
- Scissors (I prefer pinking shears (I got mine from Amazon)
- All-purpose thread
- Wonder sewing clips (I got mine from Amazon)
- 1 package of sew on hook and loop Velcro strips. (I got mine from Amazon)
- Sewing machine (I got mine from Amazon)
Instructions
Steps 1-3: Measure, mark and cut 1 piece of your main and 1 piece of your complimentary fabric 8 inches long by 8 inches wide OR 1 piece of fabric 16” long and 8” wide. Cut one piece of waterproof fabric 16” long and 8” wide. If you are using oilcloth, you don’t need the waterproof fabric. Skip that part of any of the steps that mention the waterproof fabric.
Steps 4-5: If using two pieces of fabric, with right sides facing each other, clip or pin along the bottom and sew with a 1/2” seam allowance. Iron your seams open.
Steps 6-8: With the right side of your fabrics and the shiny side of your waterproof fabric facing each other, clip or pin all four sides and sew with a 1/2” seam allowance all the way around, leaving a 3” opening to turn the fabric. Be sure to reinforce each end of this gap. Turn fabric and close the opening.
Steps 9-10: Measure two 6” pieces of the hook and loop Velcro. With a 1/4" allowance from the top of the bag and 1/2” allowance on each side, with a 1/2” seam allowance, attach the Velcro on each end of the bag.
Step 11: Fold the fabric in half, with waterproof side together, so Velcro is pressed together. Sew with a 1/4” seam allowance along the sides and across the bottom, reinforcing from where the bottom of the Velcro starts to the top, so about 1”.
You may also like to check these, too.
Unicorn Favor Bag (with Free Printable)

DIY Easy Upcycled Pallet Gardening Bed for Toddlers
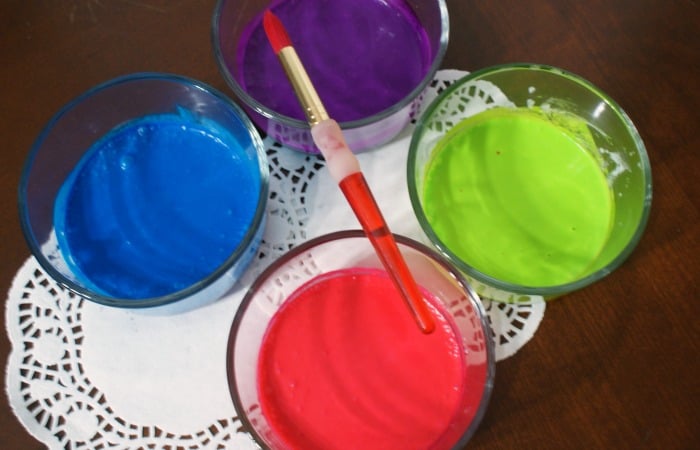
Dairy-Free Edible Neon Finger Paints