Creating a fun and functional upcycled pallet gardening bed for toddlers doesn’t have to be difficult. Using materials like an old pallet, you can build a toddler-friendly gardening bed that is safe, budget-friendly, and perfect for introducing little ones to gardening.
This step-by-step project is great for parents, grandparents, or anyone who wants to engage young children in hands-on outdoor activities. Here’s how to make a DIY pallet garden bed that your toddler will love!
Why a DIY Pallet Gardening Bed is Perfect for Toddlers
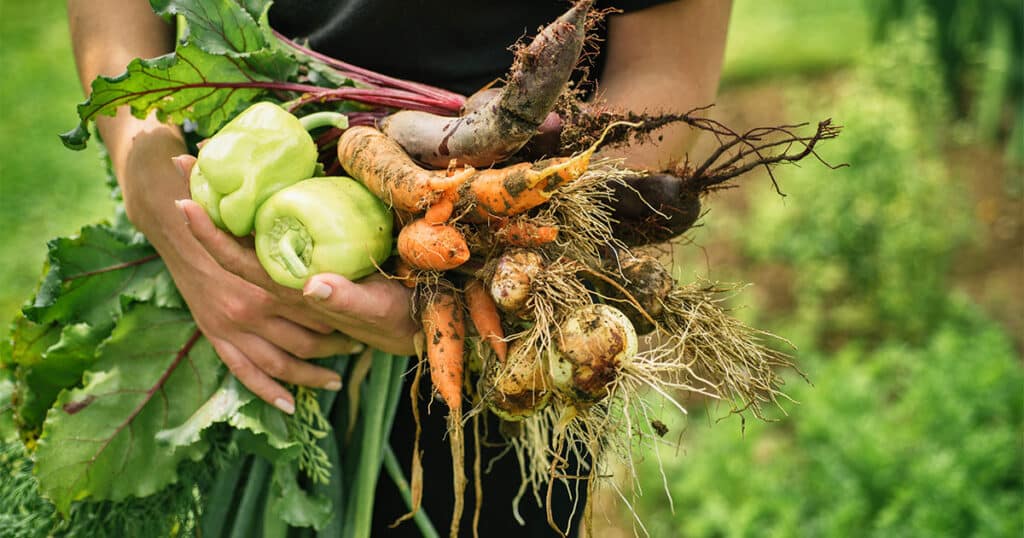
Gardening is a wonderful way to teach children about plants, responsibility, and the beauty of nature. A gardening bed that is just their size makes it easier for toddlers to participate and enjoy themselves.
Using an upcycled pallet is also an environmentally friendly option, turning a discarded item into something useful. Pallets are durable, easy to source, and can be repurposed into countless projects.
For this project, the pallet will serve as a raised bed that’s low enough for toddlers to reach but elevated enough to prevent them from accidentally trampling plants. The added benefit? It keeps your garden organized while reducing waste by giving the pallet a second life.

Materials Needed
Here’s what you’ll need to create your toddler-friendly upcycled pallet gardening bed:
- 1 Pallet: This will form the main structure of your gardening bed. Be sure to use a sturdy pallet that’s in good condition.
- 3 Black Trash Bags: These will act as a liner to keep the soil in place and prevent it from leaking out of the planter.
- 1 Small Burlap Bag: The burlap adds an extra breathable layer and helps with drainage while keeping soil contained.
- 4 Bags of Soil: Enough to fill your pallet planter and provide a healthy base for your plants to grow.
Tools Needed
Keep these tools handy to make building your garden bed quick and easy:
- Saw: For cutting the pallet in half and trimming slats to size.
- Screwdriver: Essential for affixing the horizontal slats to the structure securely.
- Screws: You’ll need these to attach slats and reinforce the structure.
- Scissors: For cutting the trash bags and burlap to fit the base of your planter.
Step-by-Step Instructions
- Prepare Your Pallet
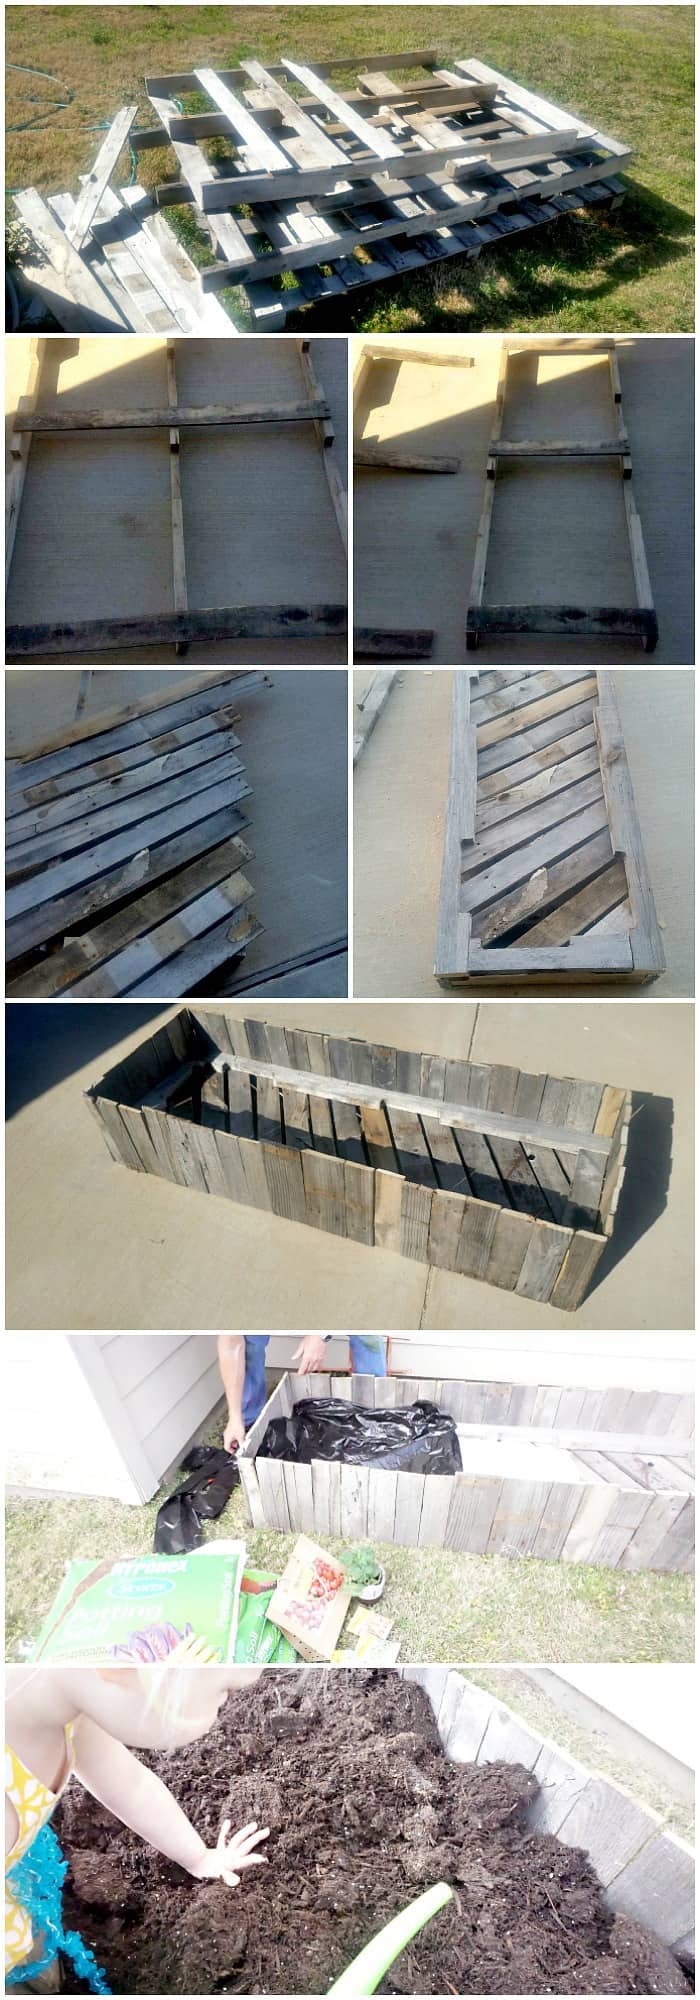
Start by sourcing a good-quality pallet. Avoid chemically treated ones and opt for heat-treated ones (look for the “HT” stamp). You’ll need to purchase the other materials—don’t take shortcuts here! - Disassemble the Pallet
Remove the horizontal slats from both sides of the pallet. Use a screwdriver or hammer to carefully detach them without breaking the wood. Set the slats aside, as you’ll use them later. - Cut the Pallet in Half
Use a saw to cut the pallet structure in half. This will create a smaller, toddler-sized planter bed that is easy for little ones to access. - Trim and Attach the Slats
- Cut several of the removed horizontal slats to match the width of your pallet half. If you’re feeling adventurous and want to cut the slats at an angle, make sure to measure everything carefully.
- Attach these trimmed slats to the top of the pallet half. These slats will help block weeds from growing into the planter.
- Build the Side Panels
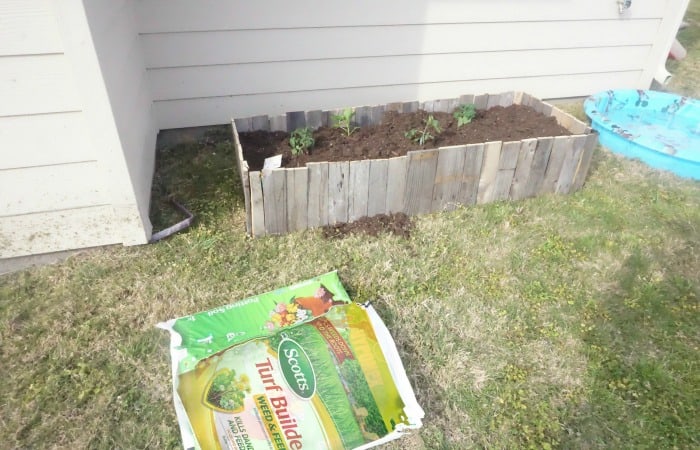
Cut the remaining slats to an even height and attach them to the sides of the pallet structure. Attach them gently to ensure stability without splitting the wood. - Position the Gardening Bed
Move your newly constructed pallet garden to a spot in your yard or patio that gets both sun and shade. This balance of light is ideal for most plants. - Add the Lining
- Line the base of the planter with the small burlap bag. This layer will help with drainage.
- Cut the black trash bags to size and layer them over the burlap. These will act as a waterproof liner to hold soil in place.
- Fill with Soil
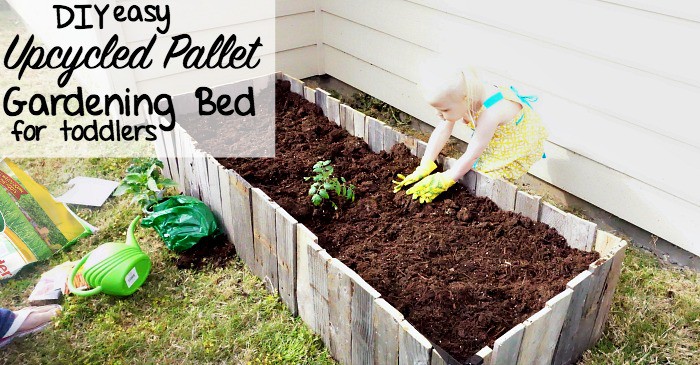
Fill your gardening bed with the soil you purchased. Spread it evenly across the planter, leaving some space at the top of each compartment for planting. - Start Planting
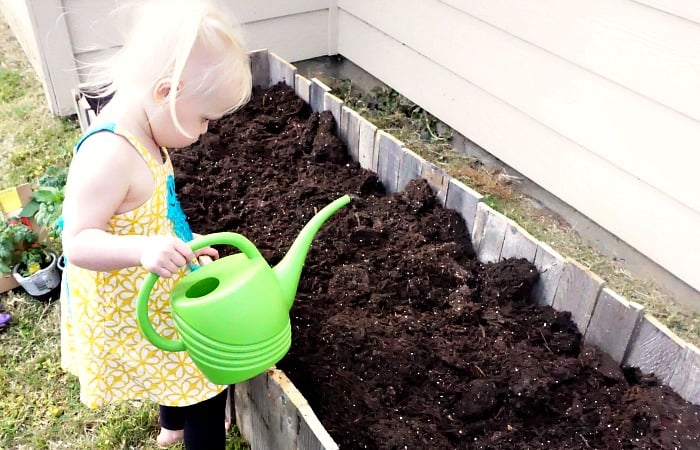
Now comes the fun part! Work with your toddler to plant seeds or seedlings in the soil. Show them how to press the seeds into the dirt gently and water their new garden.
Toddler Gardening Tips
- Make it a routine: Let your toddler help water the garden daily or check on the plants. This builds responsibility and keeps them excited about the project.
- Use labels: Create fun plant markers using popsicle sticks or painted stones so your toddler can learn the names of the plants.
- Encourage exploration: Let them touch, smell, and taste the plants (as long as they’re safe to eat). It’s a great sensory activity!
Frequently Asked Questions
What Safety Precautions Should You Take When Working with Pallets?
When working with pallets, safety should be your top priority. Start by inspecting the pallet for sharp nails, screws, or splinters, and remove any protruding hardware. Sand down rough edges to prevent injuries, especially if children will be involved in the project.
Always wear gloves while handling pallets to protect your hands from splinters, dirt, or potential contaminants. Check that the pallet is clean and free of chemical residue, mold, or pests before using it.
If you plan to cut or saw the pallet, wear safety goggles and a dust mask to shield yourself from flying debris and wood dust. Finally, work in a well-ventilated area, especially if you’re sanding, painting, or sealing the pallet.
Where Can I Find Free or Affordable Used Pallets for Building Projects?
Finding pallets for DIY projects can be easy if you know where to look. Local businesses, such as grocery stores, hardware stores, garden centers, or warehouses, often have pallets they are willing to give away or sell for a small fee.
Additionally, construction sites or shipping companies may have excess pallets they no longer need. Online marketplaces like Craigslist, Facebook Marketplace, or local community groups can also be excellent sources for free or affordable pallets.
Always ask for permission before taking pallets, and ensure they are safe for your intended use.
How to Choose a Pallet to Build a Raised Garden Bed?
When selecting a pallet for a raised garden bed, prioritize safety and functionality. Look for pallets stamped with “HT” (heat-treated), as these are free of chemical treatments and safe for use around plants and children.
Avoid pallets marked with “MB,” as they have been treated with methyl bromide, a toxic chemical. Check the pallet for signs of damage, such as cracks, splits, or signs of infestation, and choose one that is sturdy and in good condition.
Finally, ensure the pallet is made from untreated wood and has not been exposed to hazardous materials.
Are All Pallets Safe to Use?
No, not all pallets are safe to use. Pallets can be treated with chemicals or exposed to hazardous materials during their lifecycle.
Always check for a stamp indicating the treatment method: “HT” stands for heat-treated pallets, which are safe for garden projects, while “MB” indicates chemical treatment with methyl bromide, which should be avoided.
If a pallet has no stamp, it’s best to err on the side of caution and avoid using it. Additionally, inspect the pallet for stains, strong odors, or visible damage, as these can indicate contamination.
Can I Repaint or Stain the Pallet Before Using it for a Garden Bed?
Yes, you can repaint or stain the pallet before using it for a garden bed, but it’s important to use non-toxic, outdoor-safe materials. Choose paint or stain that is water-based and free of harmful chemicals to ensure it’s safe for plants and children.
Applying a non-toxic wood sealant can also help protect the pallet from weathering and extend its lifespan. Allow the paint or stain to dry completely before adding soil or plants to the garden bed.
This step is optional but can add a splash of color and make the garden bed more durable.
This project isn’t just about gardening—it’s about creating a space where toddlers can learn, play, and grow. By having their own gardening bed, kids gain a sense of ownership and pride in their little patch of greenery.
Plus, it’s a wonderful bonding activity for parents, grandparents, or caregivers to share with their toddlers.
With minimal tools and materials, you can create a fun and sustainable gardening bed that keeps little hands busy and engaged. Not only will your toddler learn about plants, but they’ll also develop fine motor skills and a love for the outdoors.
So grab a pallet and get started—your toddler’s garden awaits!
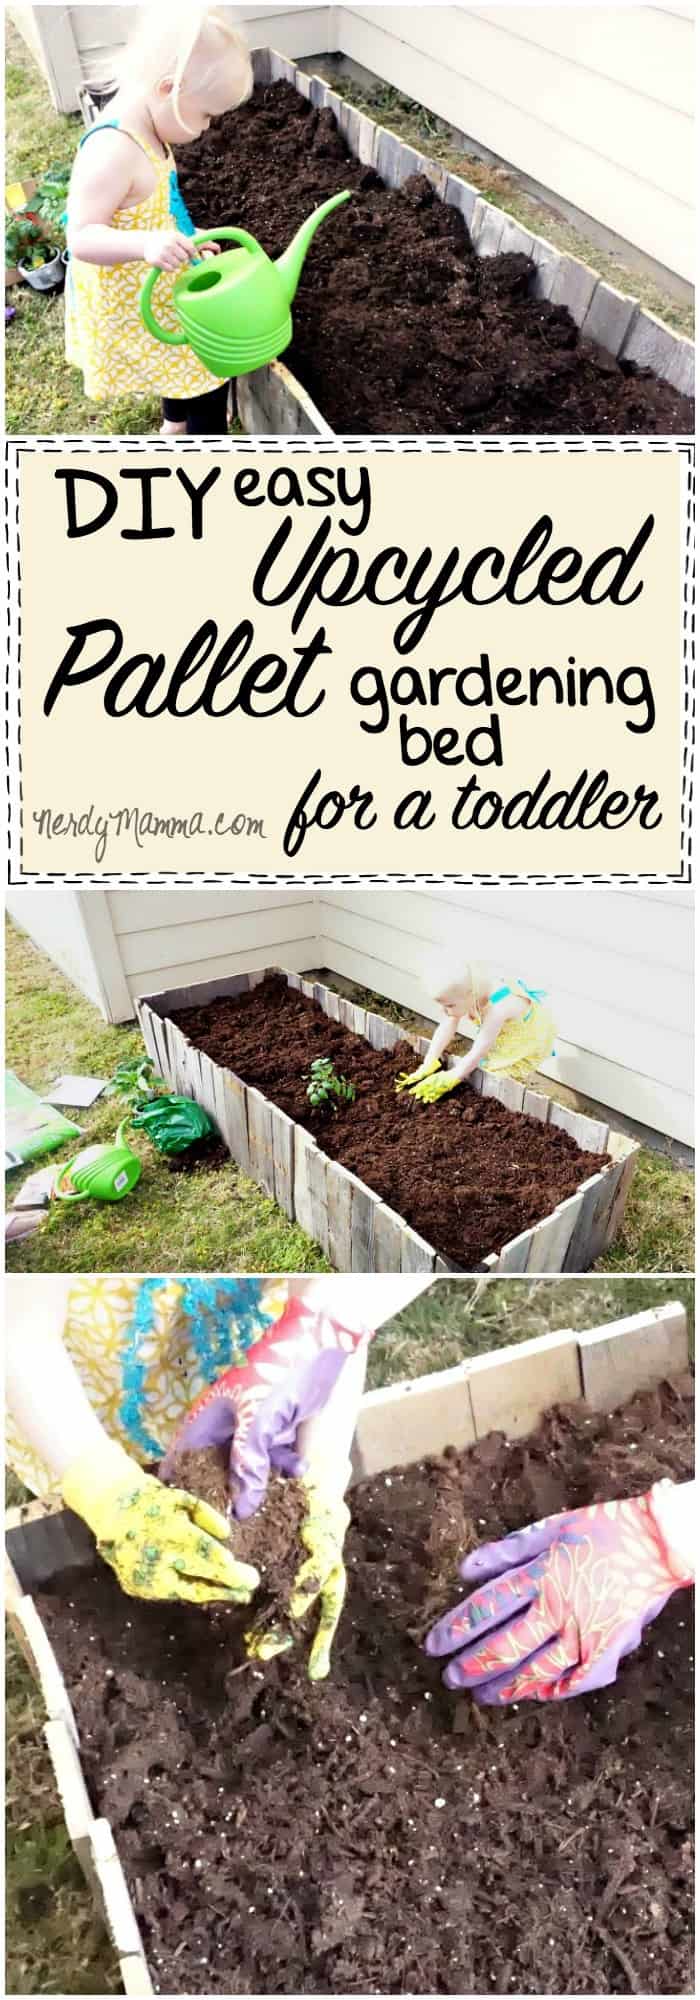
DIY Easy Upcycled Pallet Gardening Bed
My lovelies, this is the coolest spring project. A DIY Easy Upcycled Pallet Gardening Bed for Toddlers. Yeah, a garden sized just right for littlies.
Materials
- 1 Pallet
- 3 Black trash bags
- 1 Small burlap bag
- 4 Bags soil
Tools
- Saw
- Screw Driver
- Screws
- Scissors
Instructions
- Nick-off with your pallet. Purchase your other supplies. DO NOT NICK THOSE. (just FYI, I will not be pleased if you do)
- Start building your garden by removing the horizontal slats from both sides of the pallet.
- Cut pallet structure in half. Set aside
- Cut several of the removed horizontal slats to the width of the pallet structure half (if cutting at a fancy angle like I did, be sure to measure all that out--you know, measure twice, cut 4-5 times, that's my motto).
- Affix those in place on the top of the pallet structure--you want to create space so weeds don't come up into your planter.
- Cut remaining horizontal slats to an "even" height and affix them to the sides of the pallet. Gently. Very gently.
- Move your garden to where you need it--remember, sun AND shade, my lovelies. You need both.
- Line the base with your small burlap and trash bags.
- Fill garden with your dirt.
- Begin planting with your mini-me.
For More NerdyMamma Inspired Gardening Tips, Check Out These:
Maximizing Your Outdoor Space-13 Hacks for Small Gardens

Gardening Hacks for Beginners
The Ultimate Guide to Organic Gardening