
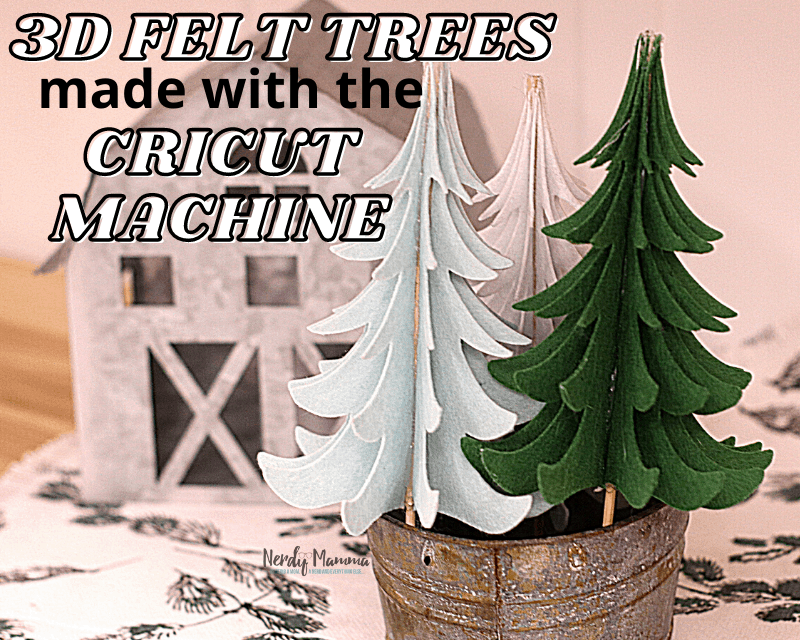
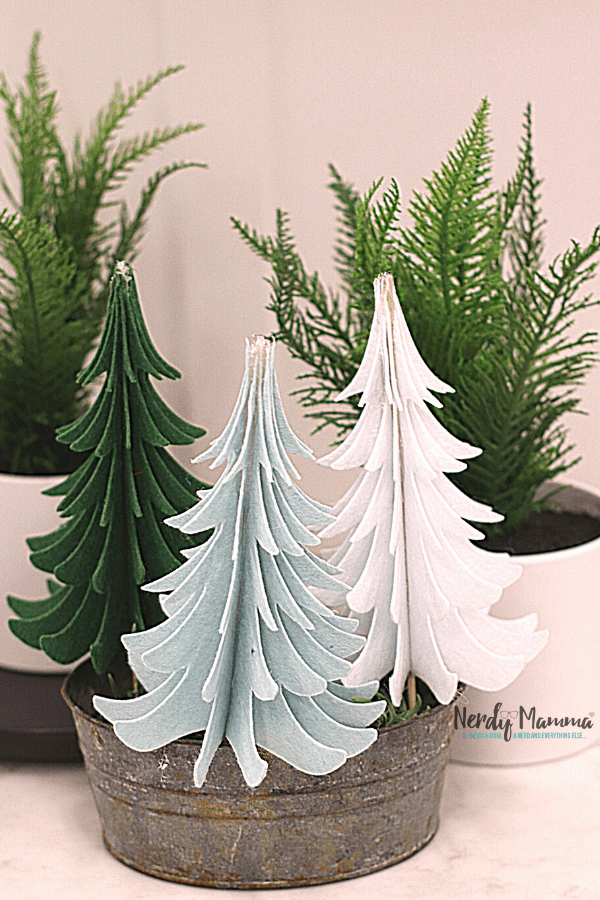
Last time, I showed you how to make Joy Bell ornament made with the Cricut machine. This time, what I am going to share is how to make the 3D Felt Trees made with the Cricut Machine.
Indeed it’s getting more exciting here especially now that the Christmas season is fast approaching.
My kids are also excited ever since they saw how the Cricut machine works. They can’t wait for our next project.
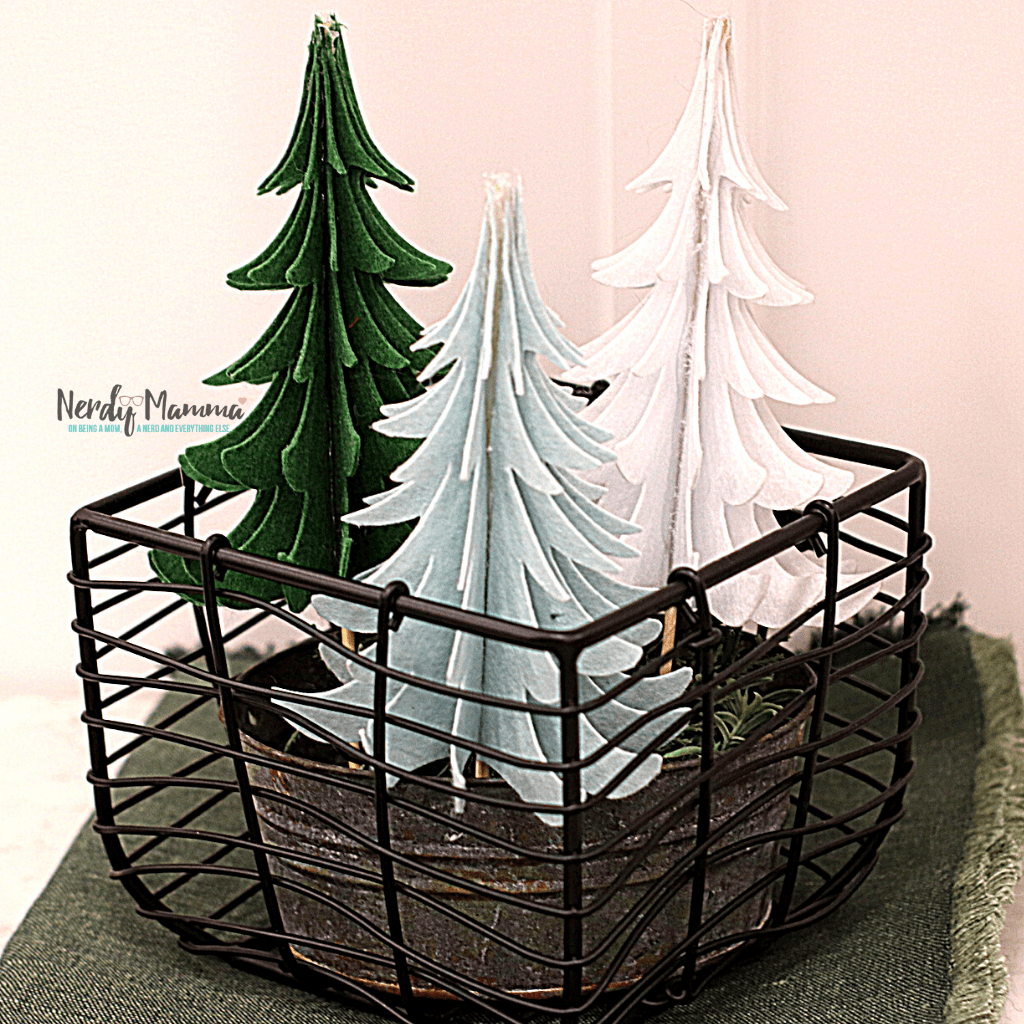
These 3D Felt Trees are definitely a perfect craft project for the coming Christmas holiday. You can have your kids join you to make this as well.
I think these trees can go well with my Felt Unicorn Ornament.
Making 3D Felt Trees
Alright! Turn on your computer or where ever your Design Space is. Have your supplies and materials ready, too.
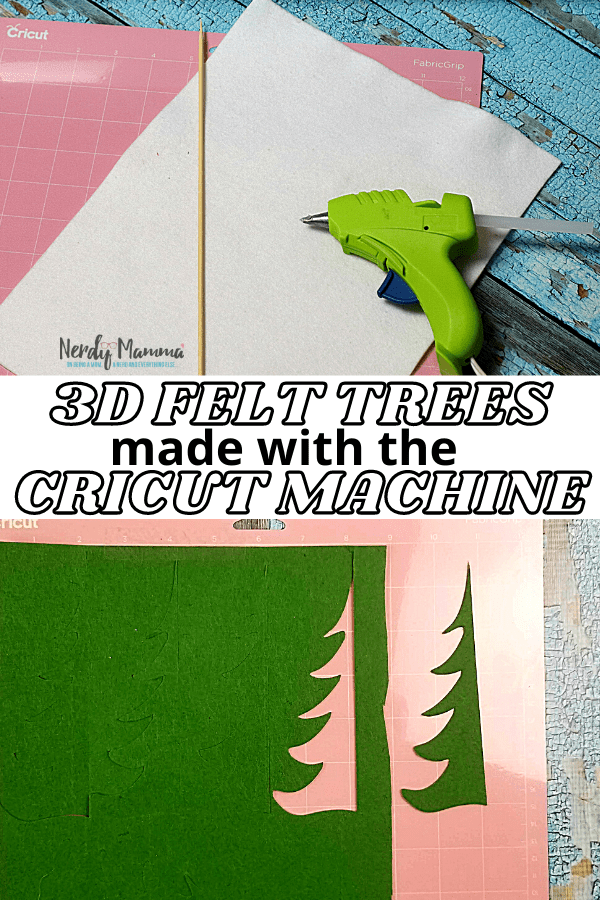
SUPPLIES
- Cricut Cutting Machine (We have the Maker)
- Cricut mat
- 3 pieces of stiff felt in any colors you like
- Cricut weeding tools
- 3 wooden dowels size 12” by ¼”
- Hot glue gun
INSTRUCTIONS:
Load your file for the trees and multiply it by 6. We had to cut our felt in half for it to fit onto the mat.
Place your felt on the appropriate mat and cut. Remove trees/felt from the mat and replace with the 2nd piece of felt and cut your next 6 trees.
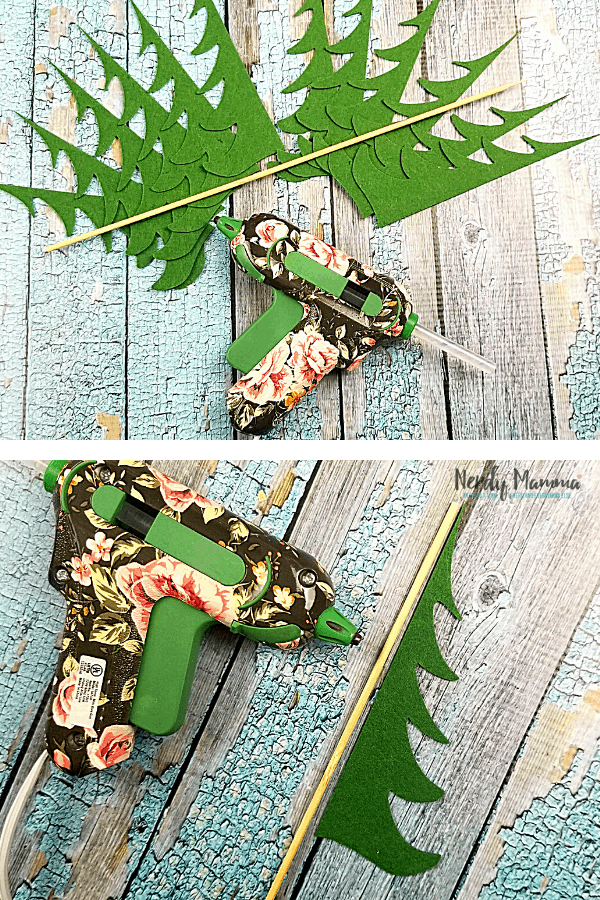
Next, using the glue gun, add 4-6 dots of glue onto the flat end of one of the trees.
Then, line up the top of a tree with the top of the dowel and press into place.
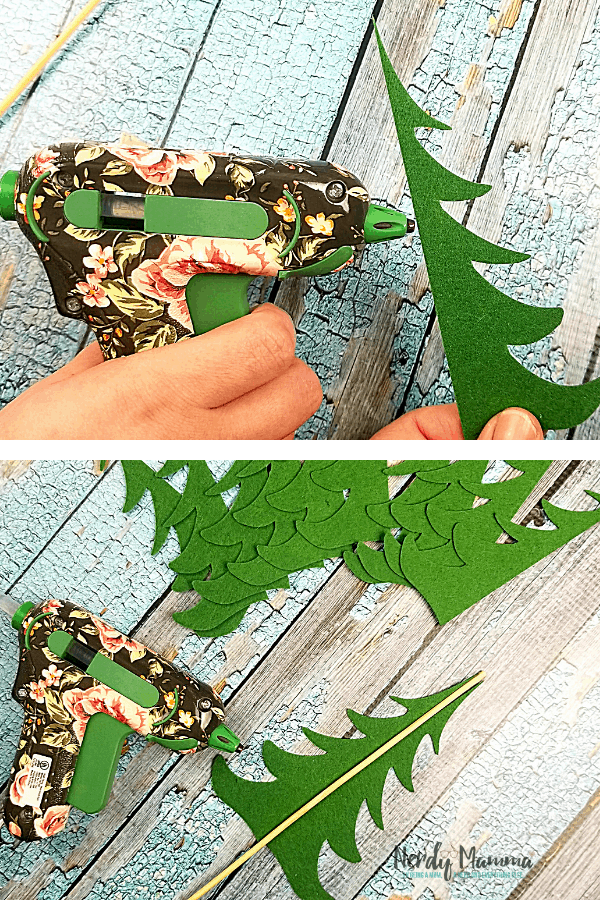
And finally… Glue the next tree on the opposite side of the 1st tree and glue into place. Continue with this pattern until the dowel is full.
Repeat the steps for the other colors.
3D Felt Trees Made With The Cricut Machine
This very easy 3D Felt trees made with the Cricut Machine are the perfect craft project for the coming Christmas Season.
Materials
- Cricut mat (You can find it here on Amazon)
- Cricut weeding tools (You can find them here on Amazon)
- 3 pieces of stiff felt in any colors you like (You can find them here on Amazon)
- 3 wooden dowels size 12” by ¼” (You can find them here on Amazon)
- Hot glue gun (You can find it here on Amazon)
Tools
- Cricut Cutting Machine (We have the Maker, which you can get here on Amazon)
Instructions
Steps 1-2: Load your file for the trees and multiply it by 6. We had to cut our felt in half for it to fit onto the mat. Place your felt on the appropriate mat and cut. Remove trees/felt from the mat and replace with the 2nd piece of felt and cut your next 6 trees.
Steps 3-4: Using the glue gun glue, add 4-6 dots of glue onto the flat end of one of the trees. Line up the top of a tree with the top of the dowel and press into place.
Steps 5: Glue the next tree on the opposite side of the 1st tree and glue into place. Continue with this pattern until the dowel is full.
Repeat the steps for the other colors.
And so. How do you like it? It’s fun, isn’t it? Don’t forget to Pin this in your Pinterest, alright. Great to share this project, too.
Do check out these other crafts, too.
Harry Potter Snitch Ornaments

5 Last Minute Holiday Hacks

Mason Jar Snow Globes