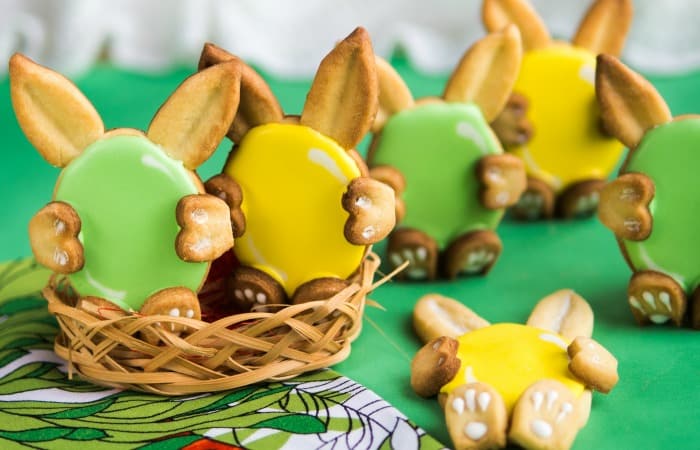
So, something happened the other day when I was testing-out recipes for Easter brunch…this. So much this: Vegan & Gluten-Free Bunny Sugar Cookies. Yeah, I mean, I know. I shouldn’t be allowed to play in the kitchen, clearly. But, since I’m an adult, there are few that can tell me “no” (and that I listen to–heh). So, this is my Easter gift to you (for the day). They’re a lot easier than they look. The hardest part is holding yourself back from eating them. I mean, seriously–they’re so cute, I just want to munch on them all!
I’m not really sure where this idea came from. I mean, obviously: Easter. But beyond that, I was just kind of messing around and really wanted a cookie, but needed an excuse idea for the blog. Right. So, I started doodling. And this happened. I mean, it took a few tries to get it right (so sad that I had to go ahead and eat those cookies that didn’t work-out, right?!), but once I did, I was able to over-cook the whole batch so that the photos were a little too brown for “perfect”. Made by me for me, that’s my motto! LOL!
BTW, you don’t have to cook them that brown–you’re welcome to follow the directions and not run with scissors like I did and try to go off memory. Silly me.
Here are the Ingredients You’ll Need to Make These Bunny Sugar Cookies
Cookies:
- Coconut oil
- Juice from canned beans
- Granulated sugar
- Vanilla extract (the clear kind)
- Baking powder
- Bob’s Redmill Gluten-Free flour
Icing:
- Powdered sugar
- Corn syrup
- Coconut milk
- Food coloring
Here’s How to Put it All Together
- Preheat oven.
- Line a baking sheet with parchment paper.
- Cream sugar and oil together.
- Add bean juice and vanilla. Mix thoroughly.
- Mix flour and baking powder together in a separate bowl.
- Add flour/baking powder mixture to the sugar mixture in 1/3 increments.
- Dough will be crumbly, but turn it out anyway and simply work with it the way it is.
- Using a roller, roll out the dough to 1/4-inch thickness.
- Cut your cookies out by cutting little ears, a body of egg and little bunny feet.
- Then place your cookies on the baking sheet.
- This is the hard part: gently, without breaking them, fold the hands and feet toward the center.
- Bake in the oven for 10 minutes. The cookies will not be brown (or they’ll be a little burnt on the edges if you’re not careful…heh), but you don’t want them to be. If they’re browned, they’ll be too crispy and they’ll fall apart when you try to ice them. So, just 10 minutes. Nothing more. Wish I’d taken my own advice.
- There’s an amazing twist to this recipe: you just feel free to eat them straight out of the oven. No need for cooling–other than to cool enough that they won’t burn you. But, these don’t need to cool to be stiff. So nice. Love it!
- Before they cool, go in and, using the flat, fat backside of a knife, put little divots in the ears to give them depth. And, using a q-tip, smoosh some pads and whatnot into the feet and hands (but be really careful–I had to sacrifice several bunnies to this step).
- But, if you want to ice them, then you DO want them to cool down. So, there’s that.
- Once they’re cool, mix your coconut milk, powdered sugar and corn syrup together.
- Separate your icing mix into separate bowls for each color and add your food coloring. But be sure to leave some plain white for the “shine” on the eggs.
- Using your teeniest piping tools, color your eggs.
- Go back in quickly and pipe-in a shine with your white icing.
- Pipe little details on the feet and hands…you know, because you just can’t get enough of these bunnies. That’s right. Love ’em.
Check out the entire recipe and instructions, below.
Vegan & Gluten-Free Bunny Sugar Cookies

Vegan & Gluten-Free Bunny Sugar Cookies
So, something happened the other day when I was testing-out recipes for Easter brunch...this. So much this: Vegan & Gluten-Free Bunny Sugar Cookies.
Ingredients
- Cookies
- 3/4 cup coconut oil, room temperature
- Juice from one can of beans, about 6 tblspns
- 1 1/2 cup sugar
- 1 1/2 tspn vanilla extract, clear–please please use clear
- 2 tspn baking powder
- 3 cups Bob's Redmill Gluten-Free flour
- Icing
- 2 cups powdered sugar
- 1/3-1/2 cup corn syrup
- 1 tblspn coconut milk, like what you use in cereal is fine
- Food coloring, to preference.
Instructions
- Preheat oven to 350-degrees.
- Line a baking sheet with parchment paper. Set aside.
- Cream sugar and oil together.
- Add bean juice and extract. Mix thoroughly. Set aside.
- Mix flour and baking powder together well in a separate bowl.
- Add flour/baking powder mixture to the sugar mixture in 1/3 increments.
- Mix thoroughly.
- Dough will be crumbly, but turn it out anyway and simply work with it the way it is.
- Using a roller, roll out the dough to 1/4-inch thickness. Do not work any thinner than that or the dough will crumble apart when you try to transfer it to the baking sheet.
- Cut your cookies out by cutting a little ear, a body of egg and your little feet. I drew one on a piece of parchment paper, cut that out with scissors, then "traced" with my knife on all mine...
- Then place your cookies on the baking sheet.
- This is the hard part: gently, without breaking them, fold the hands and feet toward the center. You may find this easier to do if you cook the cookies for about 5 minutes first, but then they're hot. So, you have to decide...
- Bake in the oven for 10 minutes. The cookies will not be brown (or they'll be a little burnt on the edges if you're not careful...heh), but you don’t want them to be. If they’re browned, they’ll be too crispy and they’ll fall apart when you try to ice them. So, just 10 minutes. Nothing more. Wish I'd taken my own advice.
- There’s an amazing twist to this recipe: you just feel free to eat them straight out of the oven. No need for cooling–other than to cool enough that they won’t burn you. But, these don’t need to cool to be stiff. So nice. Love it!
- Before they cool, go in and, using the flat, fat backside of a knife, put little divots in the ears to give them depth. And, using a q-tip, smoosh some pads and whatnot into the feet and hands (but be really careful--I had to sacrifice several bunnies to this step).
- But, if you want to ice them, then you DO want them to cool down. So, there's that.
- Once they're cool, mix your coconut milk, powdered sugar and 1/3 cup of your corn syrup together. If it's still too dry, add more corn syrup.
- Separate your desired amount for each color and add your food coloring. But be sure to leave some plain white for the "shine" on the eggs.
- Using your teeniest piping tools, color your eggs.
- Go back in quickly and pipe-in a shine with your white icing.
- Pipe little details on the feet and hands...you know, because you just can't get enough of these bunnies. That's right. Love 'em.
You Need More Easter Ideas, Right? Check Out These:
Easter Bunny Hot Cocoa Bombs

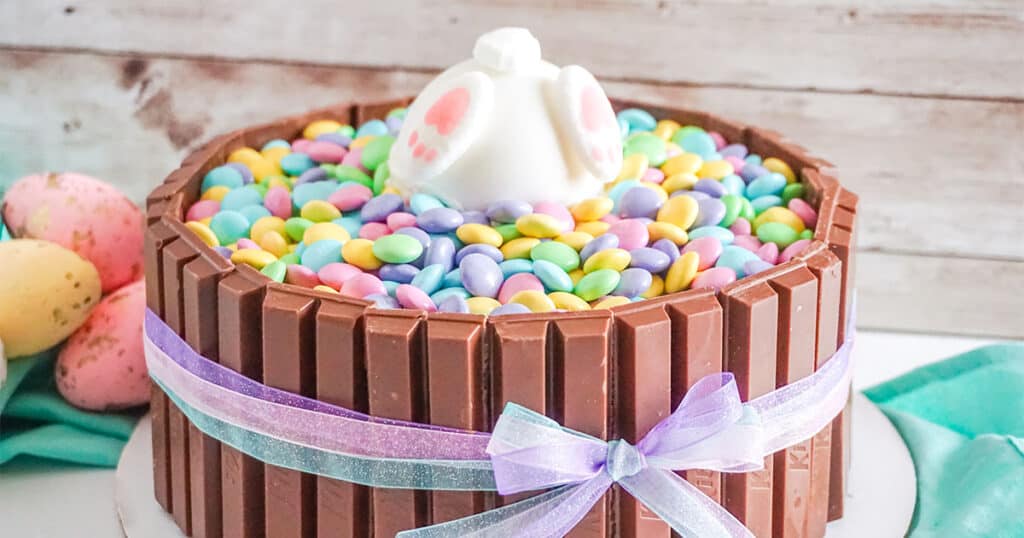
Bunny Bottoms Up Easter Cake

Strawberry Sugar Cookie Bunnies {Vegan}


