I’m not one for just doing crafts to do crafts. But I AM one that loves to make an experience “all encompassing” for a kid. So, we’ve been singing about Old McDonald and his farm with his cows and chickens like every day for a while now. And although my toddler totally gets what a “chicken” is (heck, she says “bock, bock” when I offer her a chicken nugget, heh), I thought it might be fun for her to have a beak for a little while, if only just for play-sake. So, I made this silly, Easy Chicken Mask. Pretty simple and straight-forward, until you get to that beak…but once you get what I’m saying–you get it. Then you get an easy chicken mask. LOL!

Supplies for the Chicken Mask
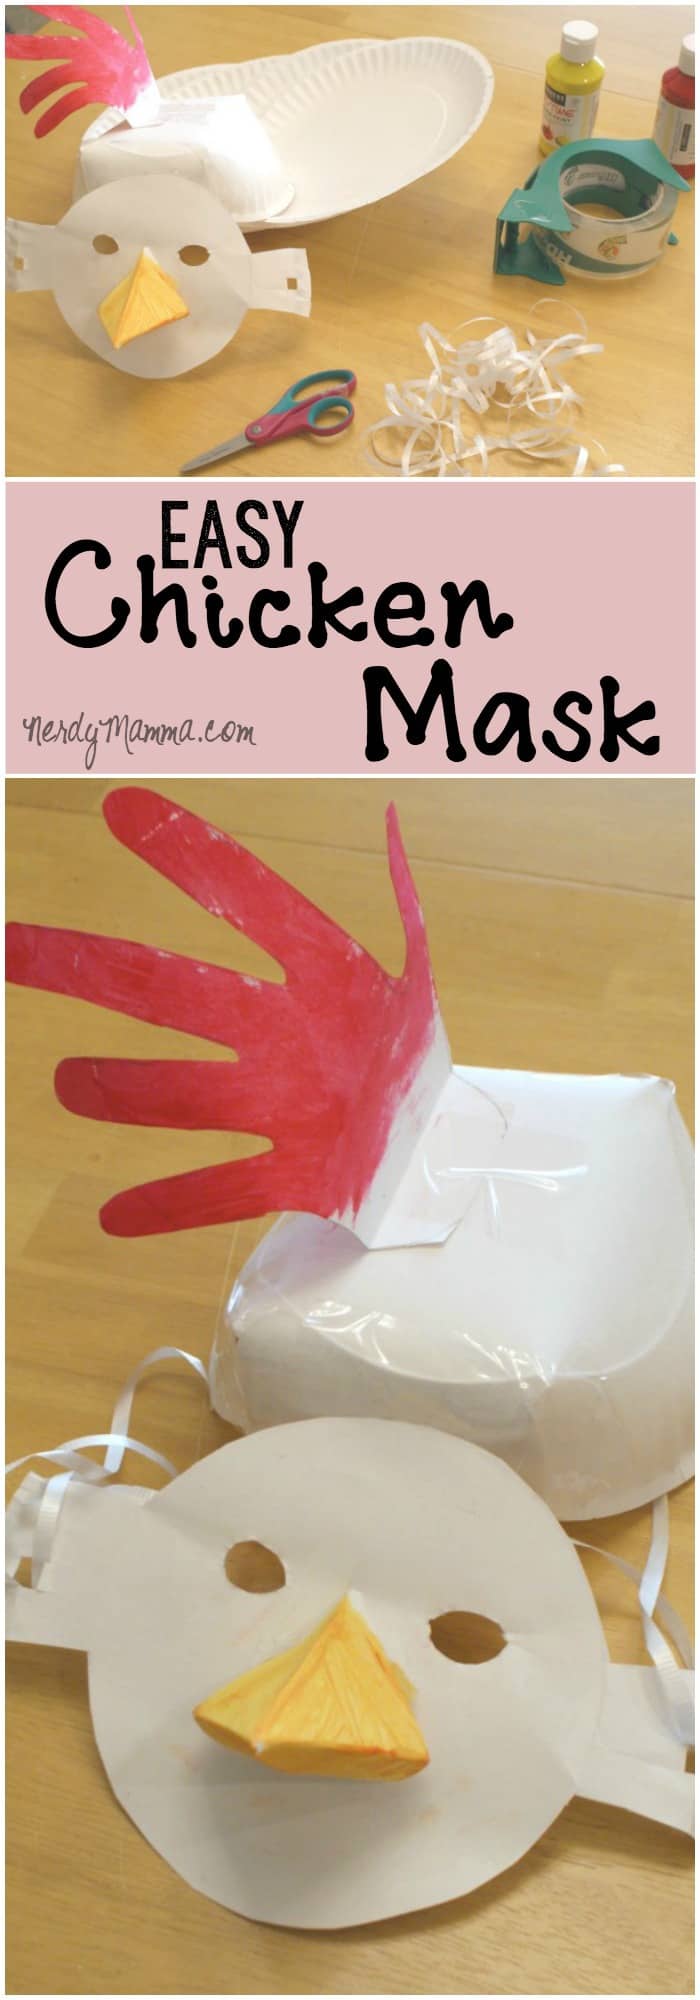
- 4 paper plates (the cheap kind are best)
- Red tempura paint
- Yellow tempura paint
- Scissors
- String
- Tape (I used packing tape because I couldn’t find any scotch tape…)
- Pencil
How to Make the Chicken Mask
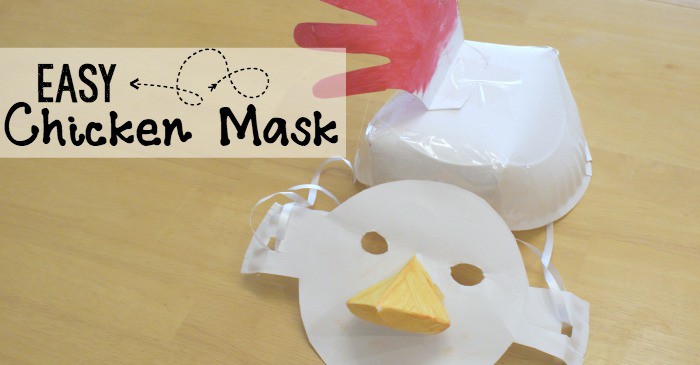
- In the center of one plate, trace your hand with the pencil.
- Cut-out the hand-shape.
- Now, go ahead and paint that hand cut-out on both sides and let it be drying while you work on the beak.
- Cut out a weirdy-shaped 1/3 of a hexagon from the center of one plate. Another way to think about this: cut out two triangles that are sitting side by side. Go ahead, draw it, make the points of the triangle meet at the same place. There. Now cut that out.
- Fold said weirdy shape in half.
- Then fold each half inward and overlapping, leaving a point in the center.
- Tape on the inside, please.
- Mix a little red tempura paint and a lot of yellow together to make an orangey color.
- Now, paint that beak orange and allow to dry while you work on the face and head.
- Cut the center out of one plate leaving two flaps on each side.
- Cut out eyes in strategically-placed locations.
- Cut out holes on the flaps for the string.
- Set face aside.
- On the last plate, cut small (about 1-inch at the base) triangles out of the edge at the 10, 2, 4 and 7 locations on a clock face.
- Fold the plate edges over until those cuts are now overlapping locations.
- Tape each of these.
- Now, tape the red hand to the top (fold down the bottom of the hand a little to give yourself a place to really tape.
- Tape the face to the head, preferably on the inside, but at this point, you’re so frustrated with me you probably don’t care.
- And, finally, add string.
- Good luck placing this on your toddler now–they’ll think it’s a hat or a toy to destroy! LOL!
More NerdyMamma Ideas You Will Enjoy:
How to Make an Easy Witch’s Fairy House
How to Make Crystal Shells
How to Make a Small Wine Butler from Scrap Wood